

This guide explains how to call Air API from your application after generating a secret key. Air API provides an OpenAI-compatible interface, allowing you to integrate with minimal code changes. If you are already using the OpenAI SDK, simply replace the base_url and API key.

Migrate from OpenAI to AirCloud

If your application already uses the OpenAI SDK, you only need to update two settings.
# Before — OpenAI
from openai import OpenAI
client = OpenAI(api_key="sk-...")

# After — AirCloud
from openai import OpenAI
client = OpenAI(
    api_key="YOUR_AIRCLOUD_API_KEY",  # Replace with your AirCloud secret key
    base_url="YOUR_ENDPOINT"          # Replace with your AirCloud endpoint
)
// Before — OpenAI
import OpenAI from "openai";
const client = new OpenAI({ apiKey: "sk-..." });

// After — AirCloud
import OpenAI from "openai";
const client = new OpenAI({
  apiKey: "YOUR_AIRCLOUD_API_KEY",  // Replace with your AirCloud secret key
  baseURL: "YOUR_ENDPOINT",         // Replace with your AirCloud endpoint
});

Migration Checklist

  • Replace base_url / baseURL with your AirCloud endpoint from the Console.
  • Replace your OpenAI API key with an AirCloud secret key.
  • Update the model parameter to an AirCloud model ID.

Find Your Endpoint and Secret Key

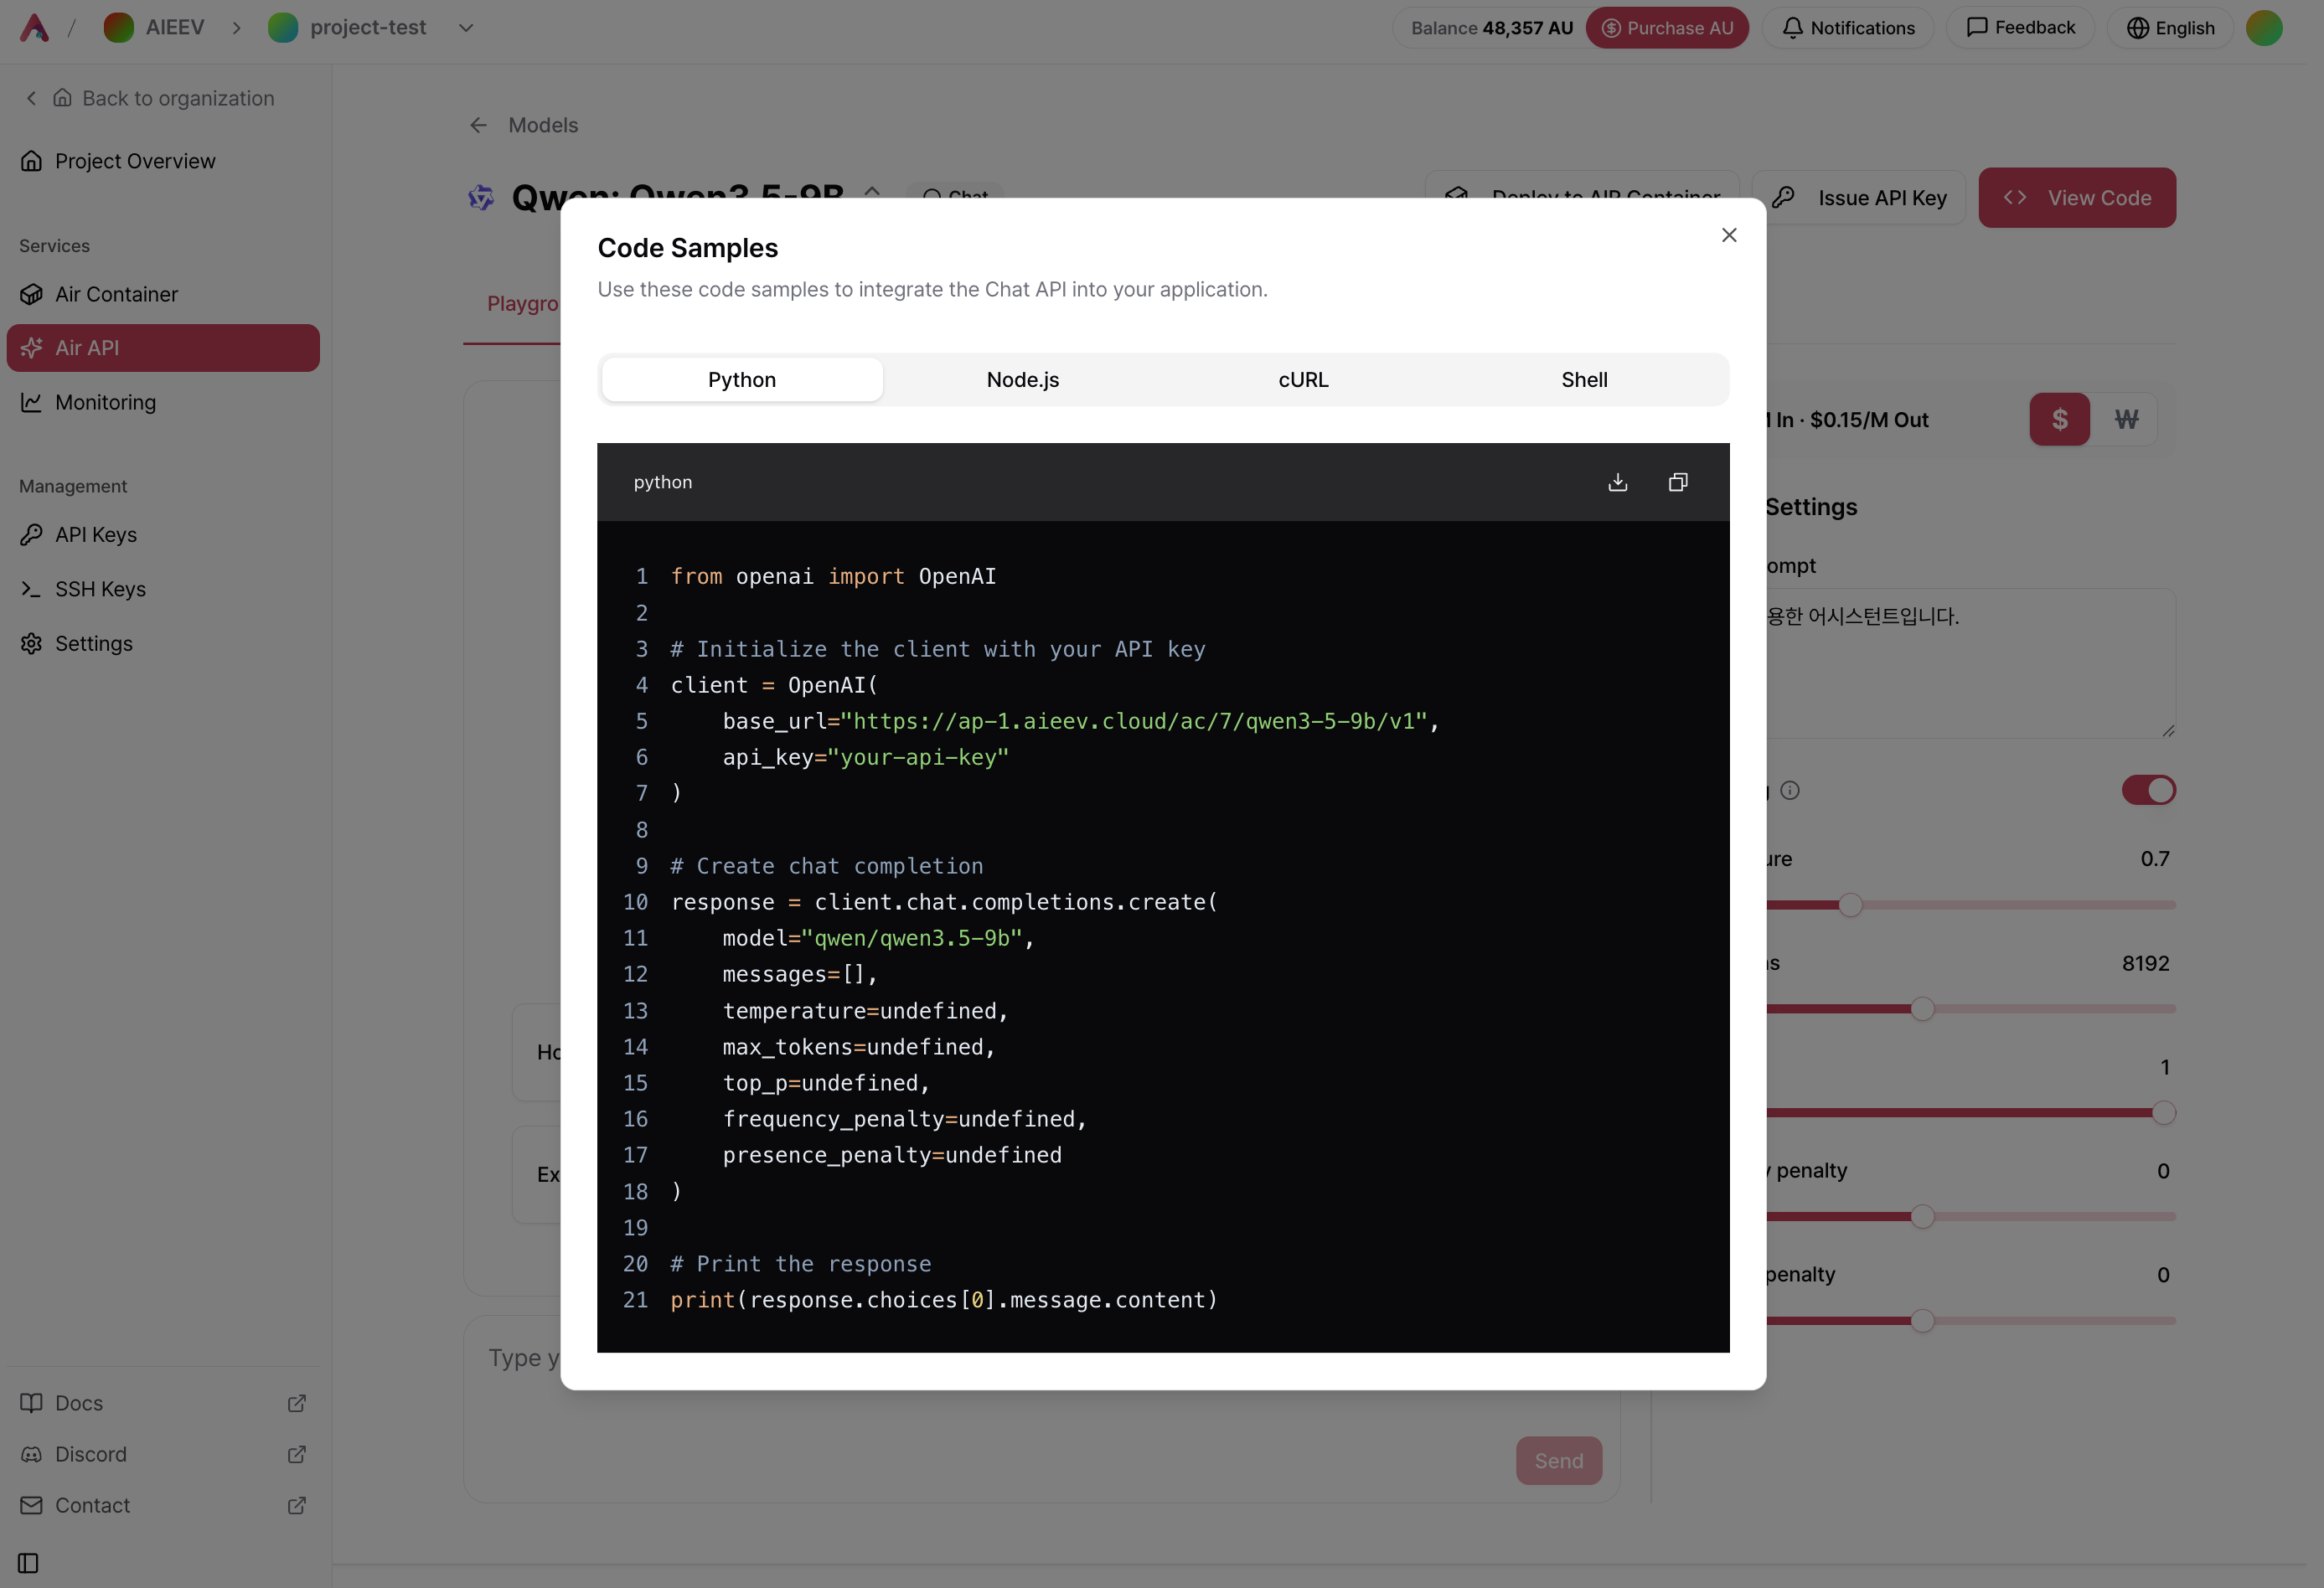
Select your API workload in the Console, then click View Code to view the endpoint URL and code samples for the selected model. Code Sample Eng Replace YOUR_ENDPOINT and YOUR_API_KEY in the sample code with the values from your Console.
Authentication

Include your secret key in the Authorization header for every API request.
Authorization: Bearer YOUR_API_KEY
A secret key is displayed only once when it is created. We recommend storing it as an environment variable instead of hardcoding it in your source code. If you lose the key, generate a new one from the Console.

Code Examples

Chat Models

from openai import OpenAI

client = OpenAI(
    api_key="YOUR_API_KEY",
    base_url="YOUR_ENDPOINT"
)

response = client.chat.completions.create(
    model="YOUR_MODEL_ID",
    messages=[
        {"role": "user", "content": "Hello"}
    ]
)

print(response.choices[0].message.content)
import OpenAI from "openai";

const client = new OpenAI({
  apiKey: "YOUR_API_KEY",
  baseURL: "YOUR_ENDPOINT",
});

const response = await client.chat.completions.create({
  model: "YOUR_MODEL_ID",
  messages: [{ role: "user", content: "Hello" }],
});

console.log(response.choices[0].message.content);
curl YOUR_ENDPOINT/chat/completions \
  -H "Authorization: Bearer YOUR_API_KEY" \
  -H "Content-Type: application/json" \
  -d '{
    "model": "YOUR_MODEL_ID",
    "messages": [
      {"role": "user", "content": "Hello"}
    ]
  }'
#!/bin/bash

API_KEY="YOUR_API_KEY"

response=$(curl -s -X POST YOUR_ENDPOINT/chat/completions \
  -H "Authorization: Bearer $API_KEY" \
  -H "Content-Type: application/json" \
  -d '{
  "model": "YOUR_MODEL_ID",
  "messages": [{"role": "user", "content": "Hello"}]
}')

echo "$response" | jq .

TTS Models

from openai import OpenAI

client = OpenAI(
    api_key="YOUR_API_KEY",
    base_url="YOUR_ENDPOINT"
)

response = client.audio.speech.create(
    model="YOUR_MODEL_ID",
    input="Hello. It's a beautiful day today.",
    voice="aiden"
)

response.stream_to_file("output.mp3")
import OpenAI from "openai";
import fs from "fs";

const client = new OpenAI({
  apiKey: "YOUR_API_KEY",
  baseURL: "YOUR_ENDPOINT",
});

const response = await client.audio.speech.create({
  model: "YOUR_MODEL_ID",
  input: "Hello. It's a beautiful day today.",
  voice: "aiden",
});

const buffer = Buffer.from(await response.arrayBuffer());
fs.writeFileSync("output.mp3", buffer);
curl YOUR_ENDPOINT/audio/speech \
  -H "Authorization: Bearer YOUR_API_KEY" \
  -H "Content-Type: application/json" \
  -d '{
    "model": "YOUR_MODEL_ID",
    "input": "Hello. It'\''s a beautiful day today.",
    "voice": "aiden"
  }' \
  --output output.mp3
#!/bin/bash

API_KEY="YOUR_API_KEY"

curl -s -X POST YOUR_ENDPOINT/audio/speech \
  -H "Authorization: Bearer $API_KEY" \
  -H "Content-Type: application/json" \
  -d '{
  "model": "YOUR_MODEL_ID",
  "input": "Hello. It'\''s a beautiful day today.",
  "voice": "aiden"
}' \
  --output output.mp3

Embedding Models

from openai import OpenAI

client = OpenAI(
    api_key="YOUR_API_KEY",
    base_url="YOUR_ENDPOINT"
)

response = client.embeddings.create(
    model="YOUR_MODEL_ID",
    input="Convert this text into an embedding."
)

print(response.data[0].embedding)
import OpenAI from "openai";

const client = new OpenAI({
  apiKey: "YOUR_API_KEY",
  baseURL: "YOUR_ENDPOINT",
});

const response = await client.embeddings.create({
  model: "YOUR_MODEL_ID",
  input: "Convert this text into an embedding.",
});

console.log(response.data[0].embedding);
curl -X POST YOUR_ENDPOINT/embeddings \
  -H "Authorization: Bearer YOUR_API_KEY" \
  -H "Content-Type: application/json" \
  -d '{
  "model": "YOUR_MODEL_ID",
  "input": "Convert this text into an embedding."
}'
#!/bin/bash

API_KEY="YOUR_API_KEY"

response=$(curl -s -X POST YOUR_ENDPOINT/embeddings \
  -H "Authorization: Bearer $API_KEY" \
  -H "Content-Type: application/json" \
  -d '{
  "model": "YOUR_MODEL_ID",
  "input": "Convert this text into an embedding."
}')

echo "$response" | jq .

Best Practices

  • Protect your API key — Store your secret key as an environment variable and never commit it to a source repository.
  • Monitor usage — Regularly review API usage and costs in the Usage tab of the Console.
  • Maintain available credits — API requests stop when your credits are exhausted. We recommend enabling automatic top-up to avoid service interruptions.

Models and Playground

Learn how to select models and test them using the Playground.

Troubleshooting

Find solutions to common issues and errors.

API Reference

Explore detailed API specifications, including endpoints and parameters.