> ## Documentation Index
> Fetch the complete documentation index at: https://docs.aieev.com/llms.txt
> Use this file to discover all available pages before exploring further.
# Air API
> 모델 API를 빠르게 연동하고 테스트하는 방법
Air API는 프로젝트 안에서 지원 모델을 선택하고, 시크릿 키를 발급받아 코드 샘플 또는 Playground를 통해 빠르게 연동할 수 있는 API 기반 워크로드입니다. 별도 인프라 없이 모델 API를 붙이고 싶은 경우, 초기 PoC나 프로토타입을 빠르게 검증하고 싶은 경우에 적합합니다.
## Air API로 할 수 있는 일
프로젝트 안에서 필요한 AI 모델을 선택합니다. 지원 모델은 지속적으로 추가됩니다.
API 액세스 엔드포인트를 선택하고 시크릿 키를 발급받습니다.
발급받은 키로 바로 연결 테스트를 진행할 수 있습니다.
Web UI에서 모델 동작을 브라우저로 직접 확인합니다.
## Quickstart
### 1. 프로젝트 개요에서 Air API 선택
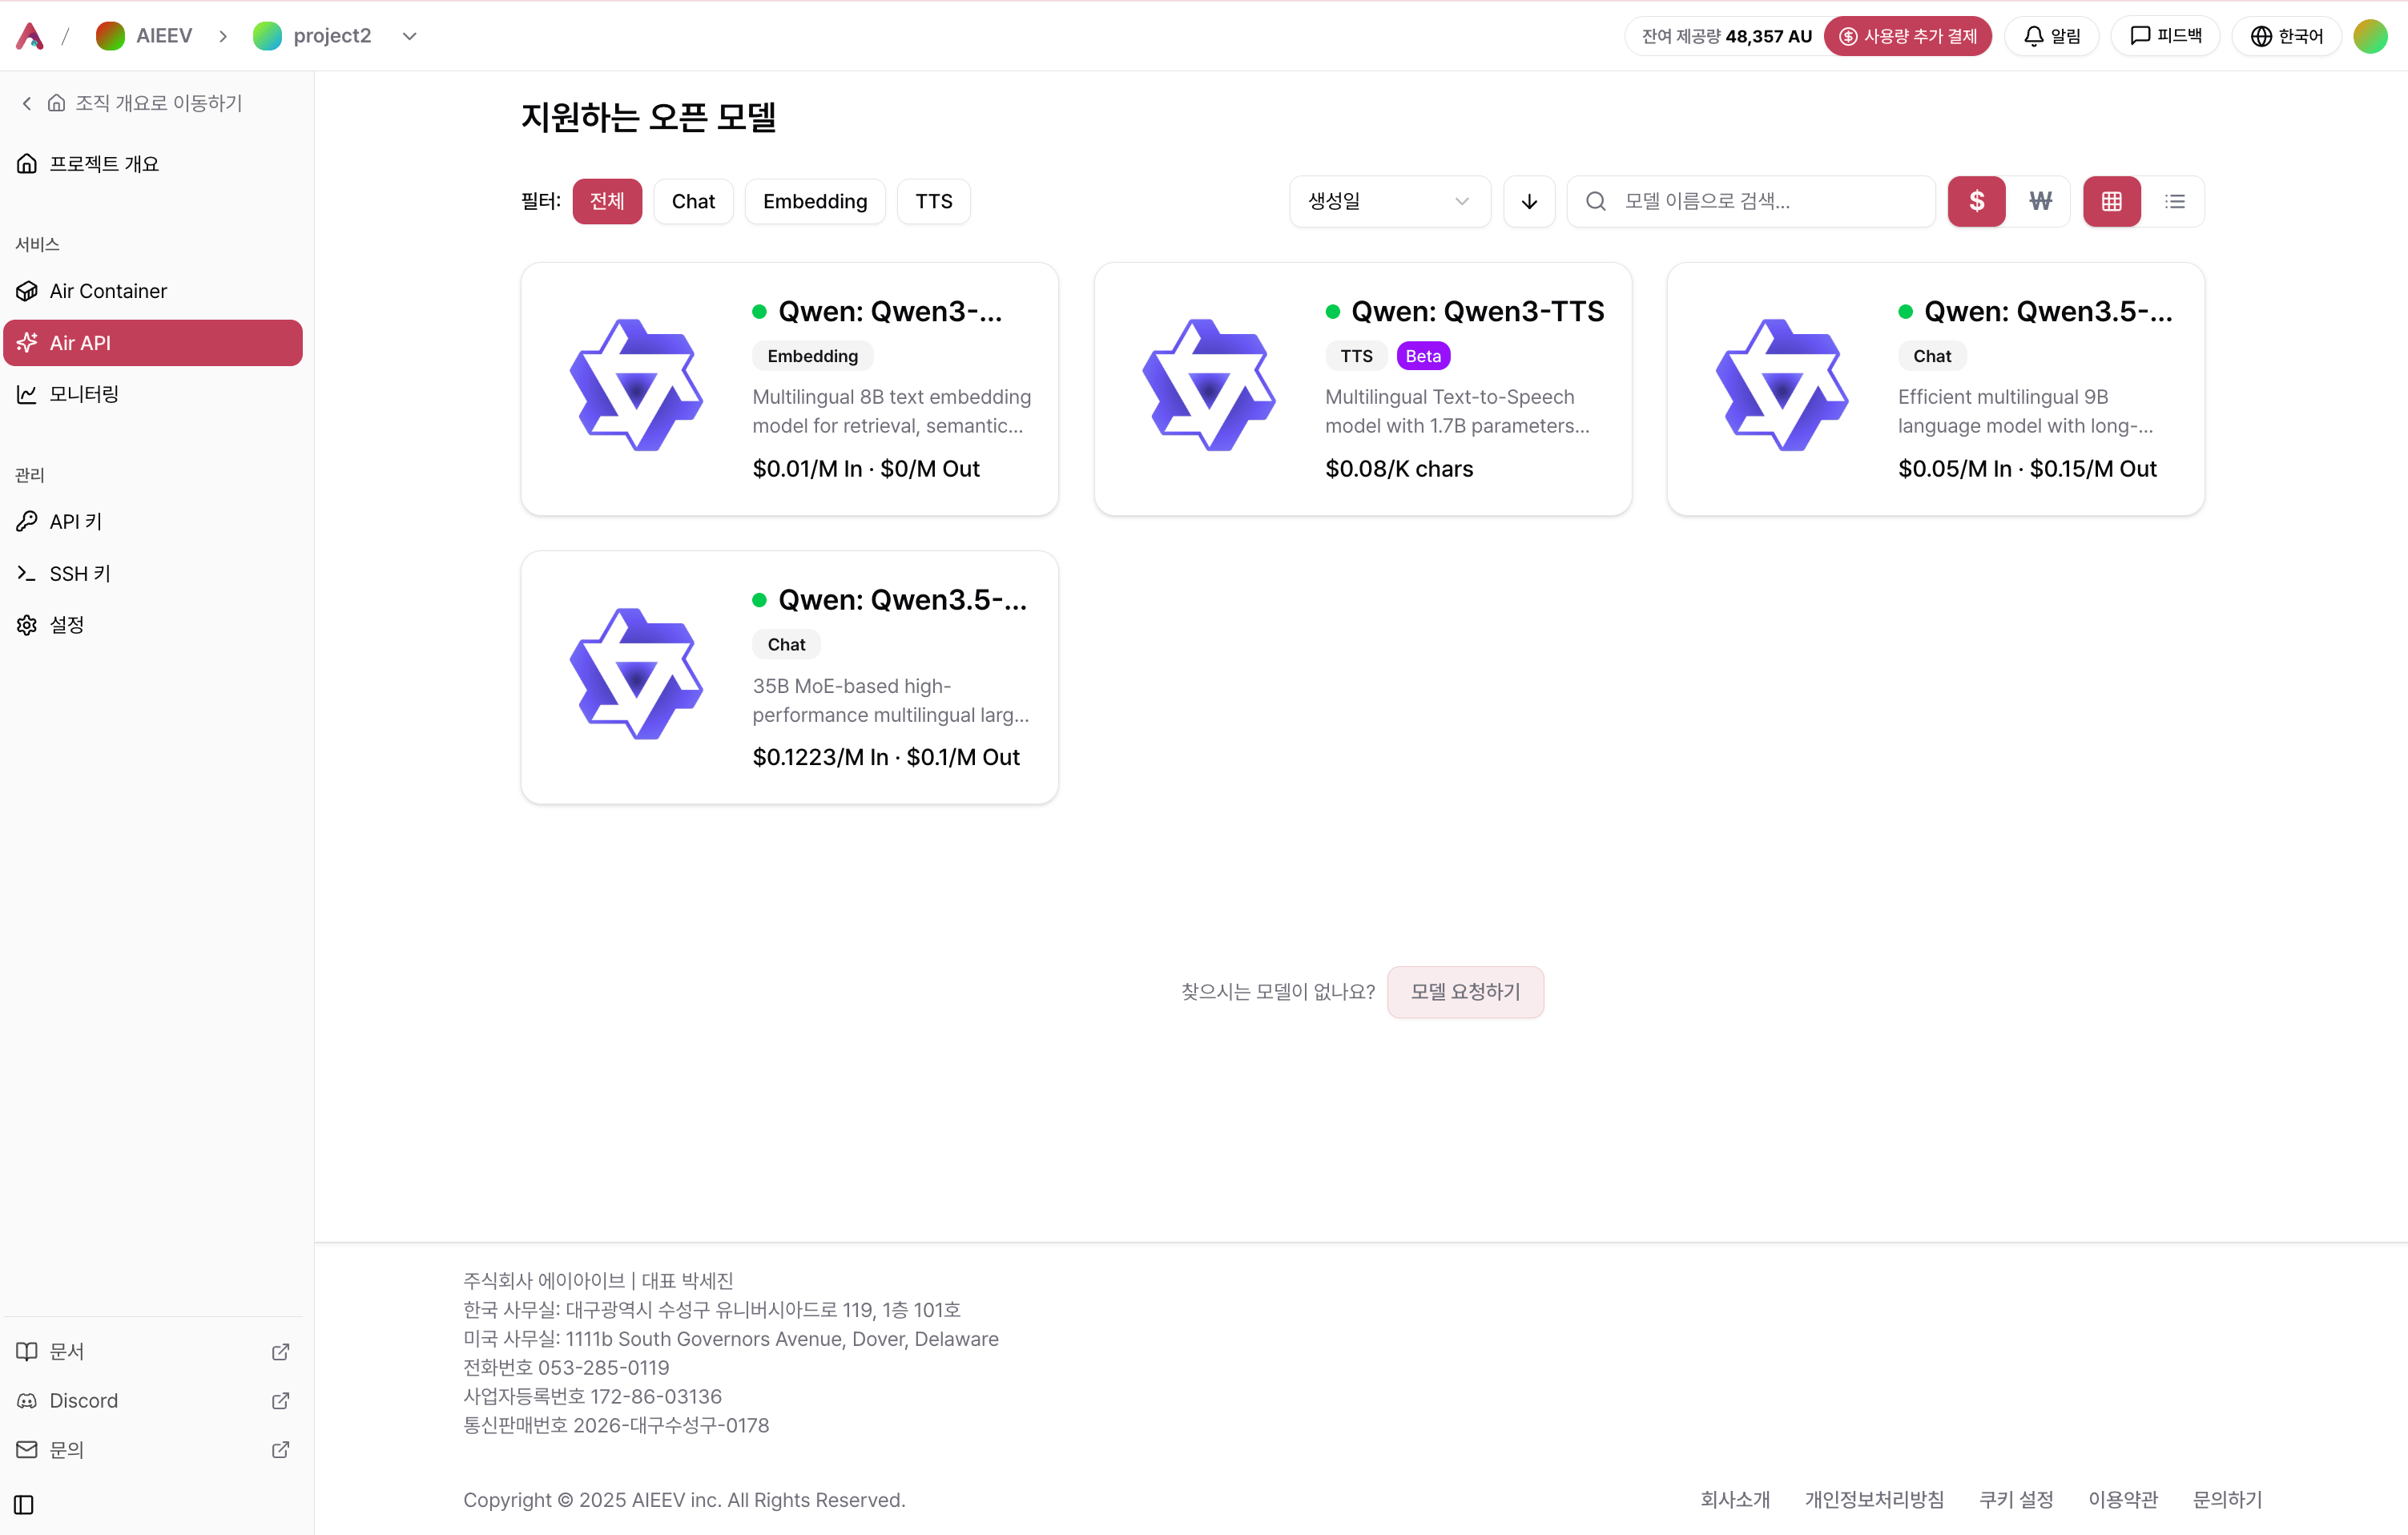 조직과 프로젝트를 생성한 뒤, 프로젝트 개요 화면으로 이동하여 **Air API**를 선택합니다.
### 2. 사용할 모델 선택
조직과 프로젝트를 생성한 뒤, 프로젝트 개요 화면으로 이동하여 **Air API**를 선택합니다.
### 2. 사용할 모델 선택
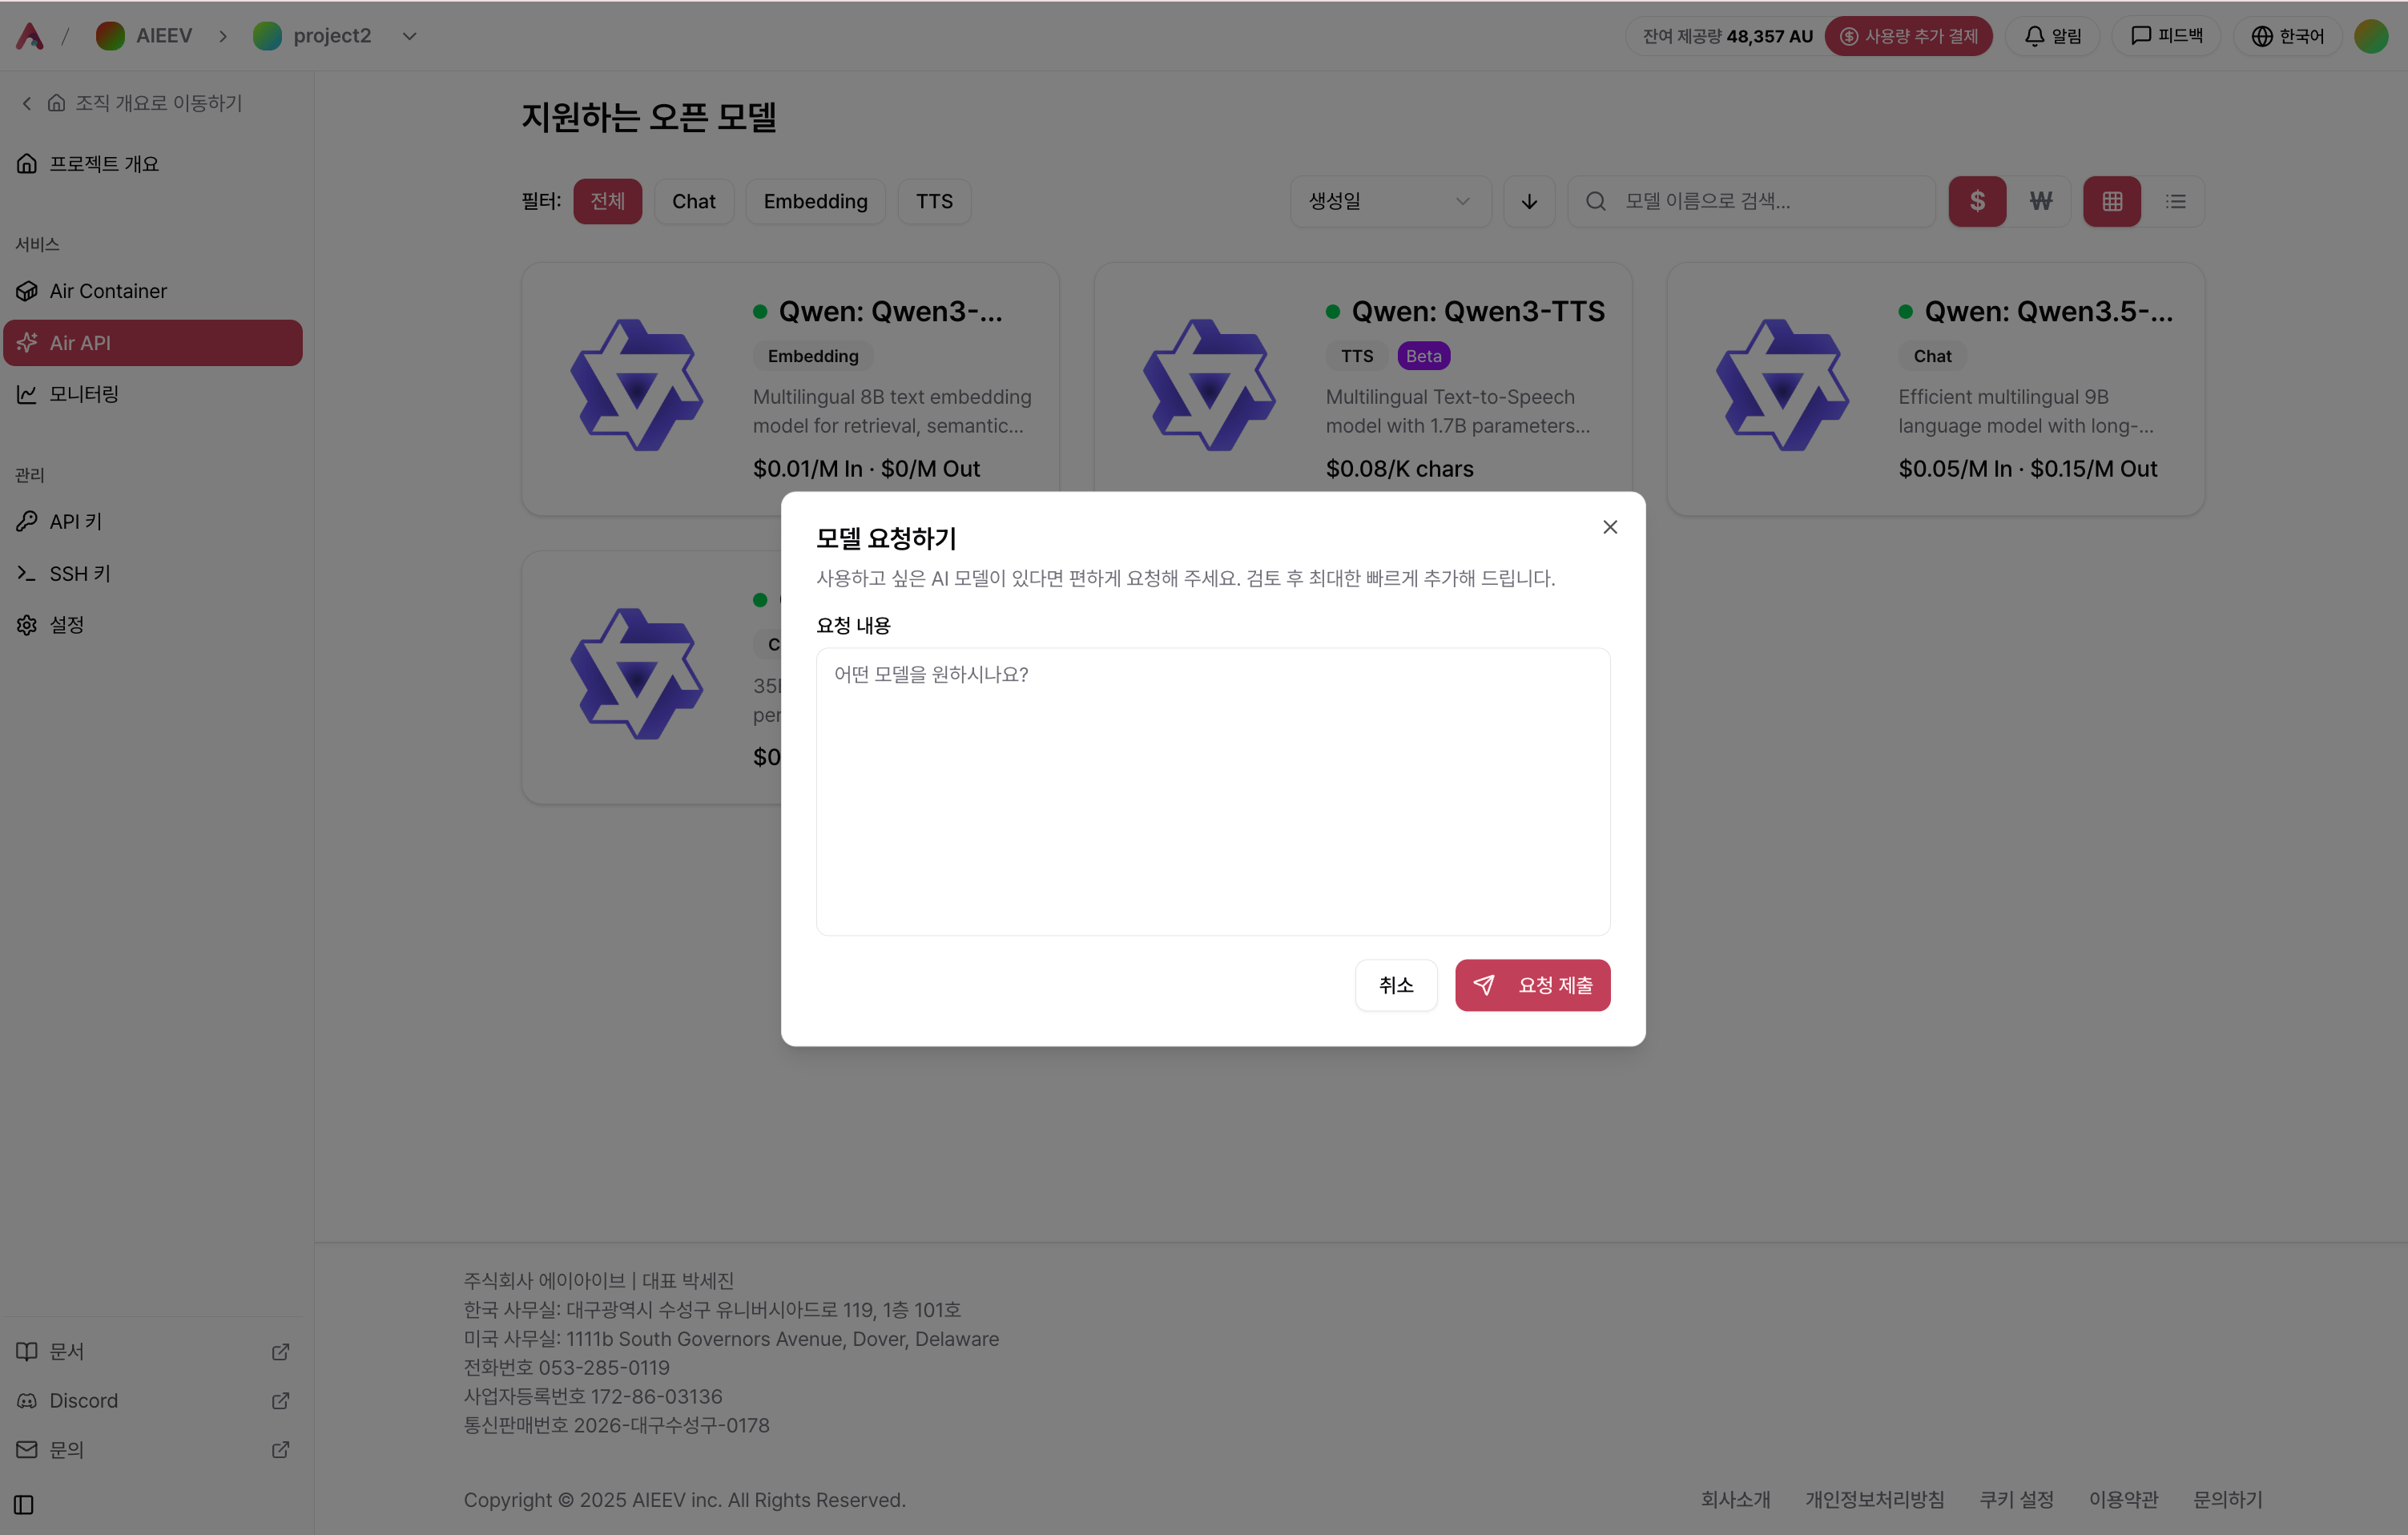 API 워크로드를 생성하고 필요한 모델을 선택합니다. 필요한 모델이 목록에 없는 경우 피드백을 통해 요청할 수 있습니다.
### 3. 시크릿 키 발급
**API 키 > 시크릿 키 생성** 으로 API 키를 생성합니다.
API 워크로드를 생성하고 필요한 모델을 선택합니다. 필요한 모델이 목록에 없는 경우 피드백을 통해 요청할 수 있습니다.
### 3. 시크릿 키 발급
**API 키 > 시크릿 키 생성** 으로 API 키를 생성합니다.
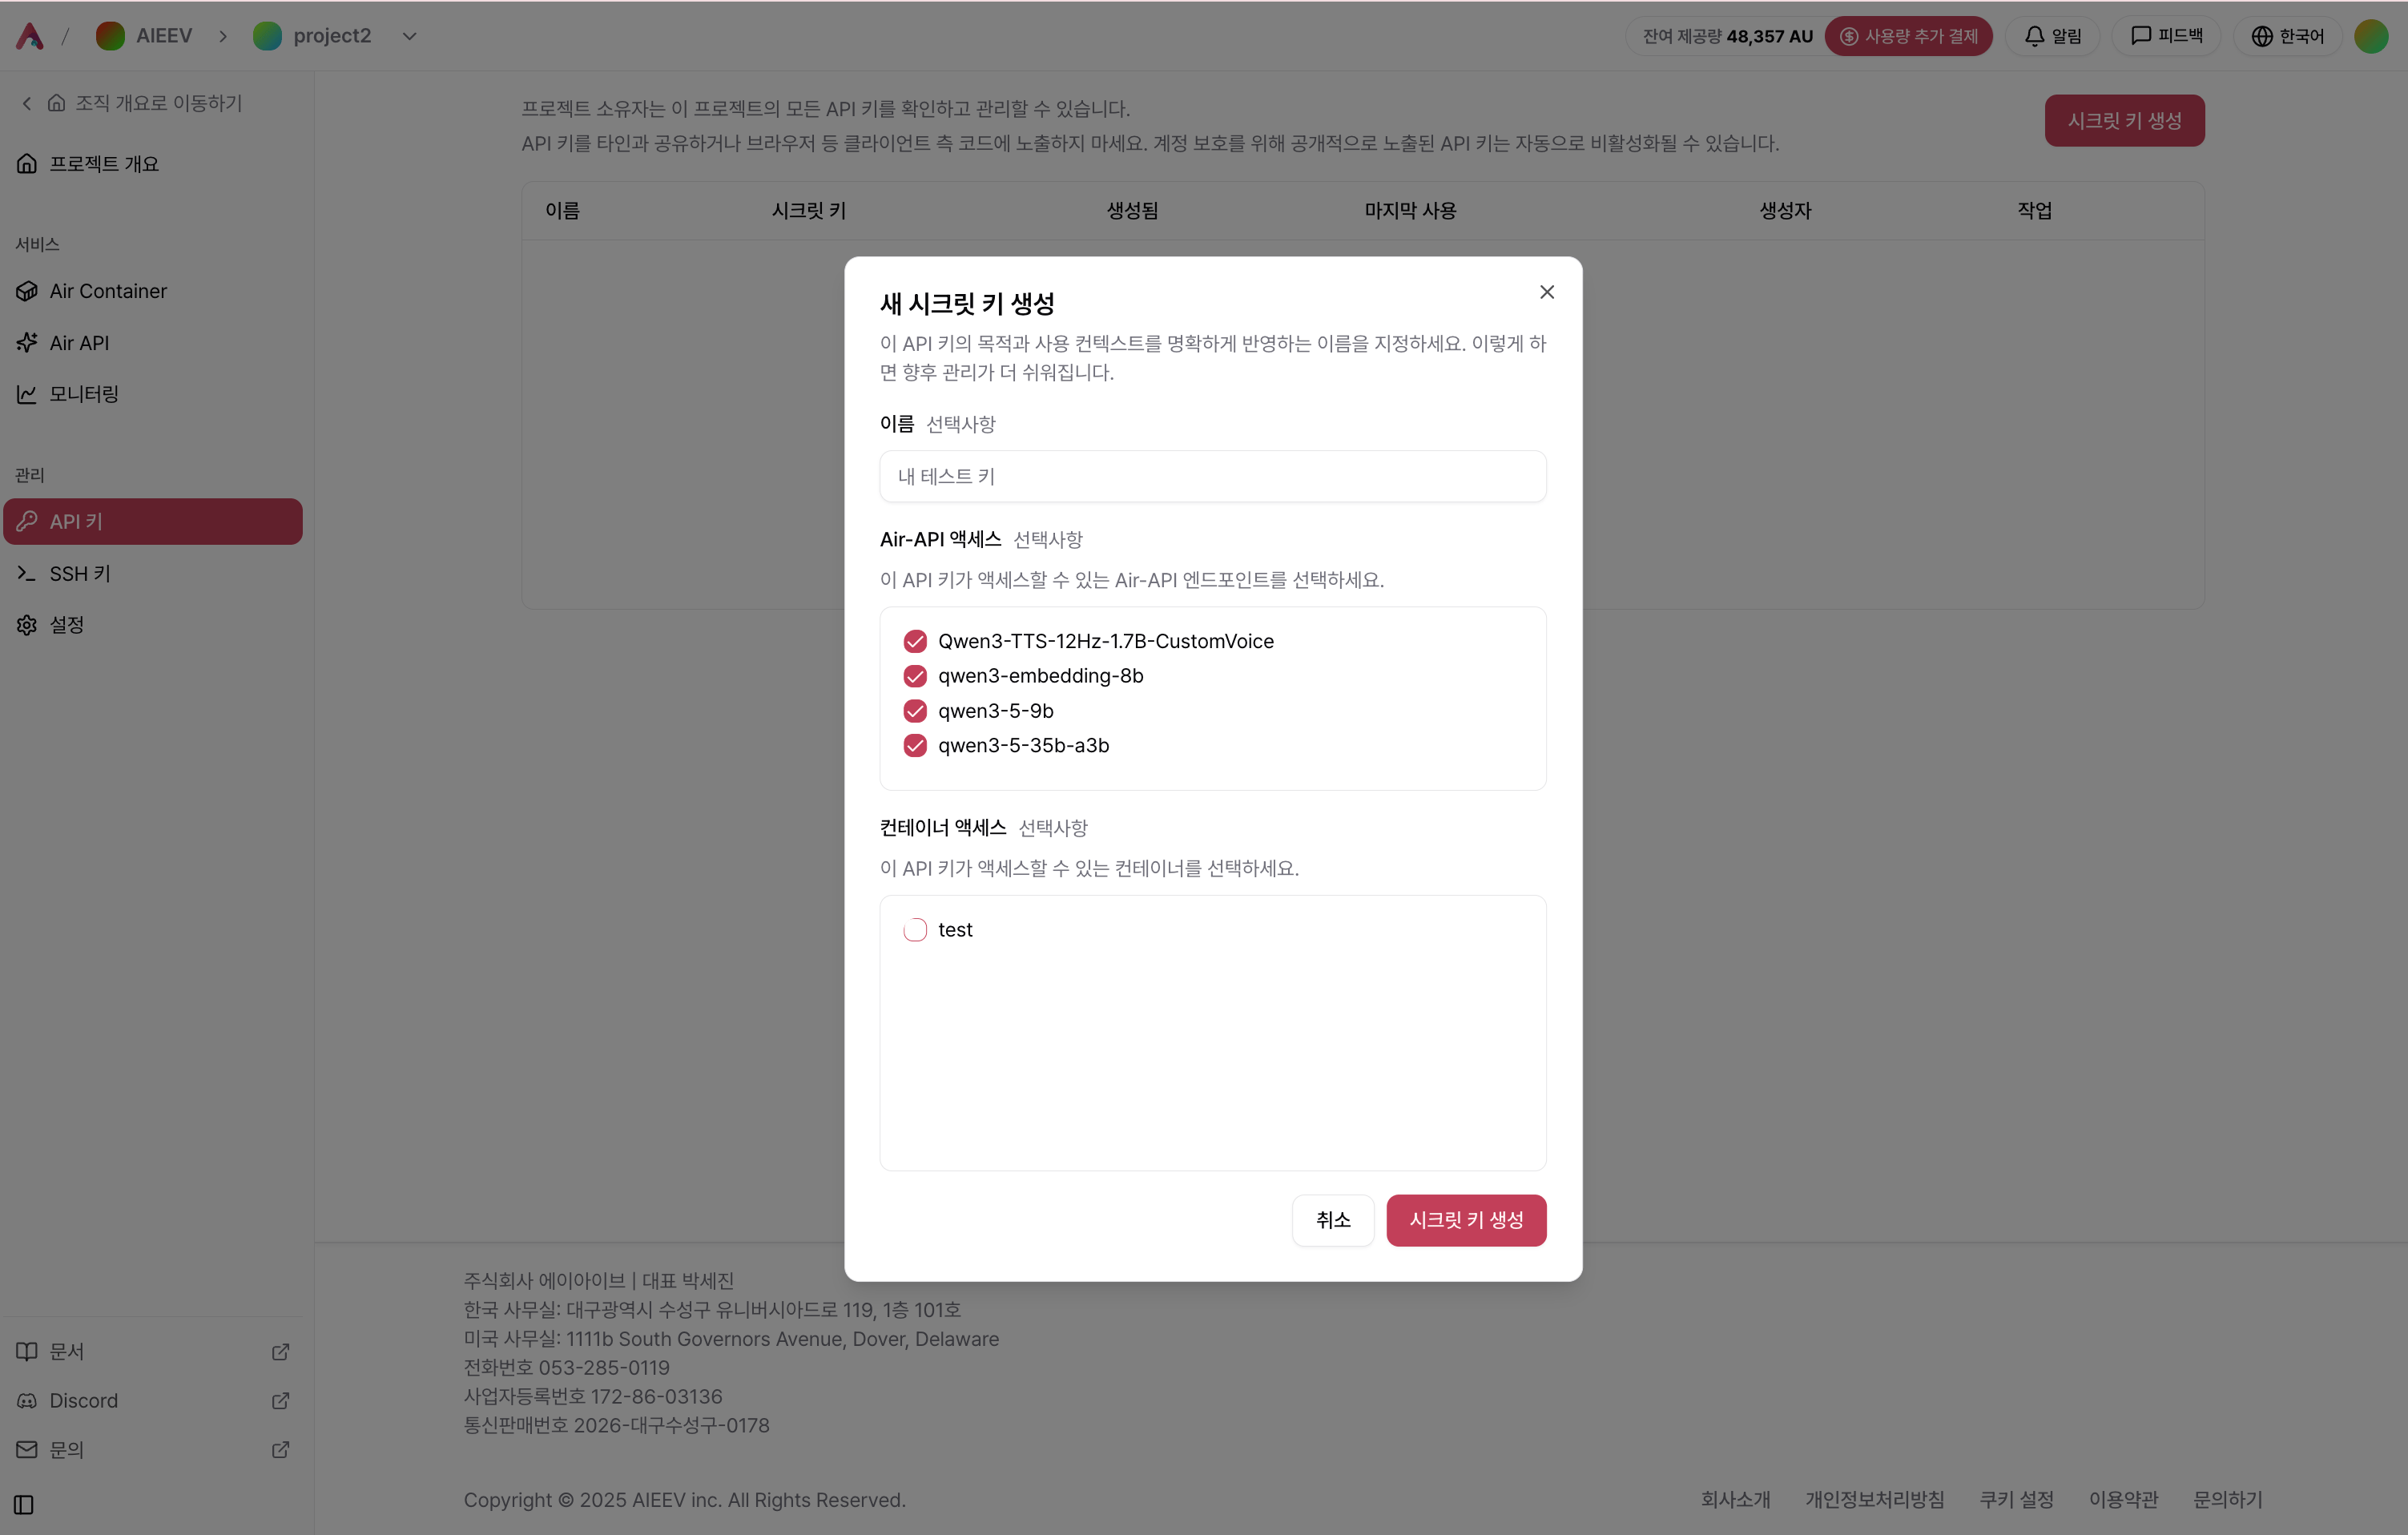 시크릿 키는 생성 이후 다시 확인할 수 없습니다. 반드시 복사해 안전하게 보관하세요.
### 4. 코드 샘플로 연결 테스트
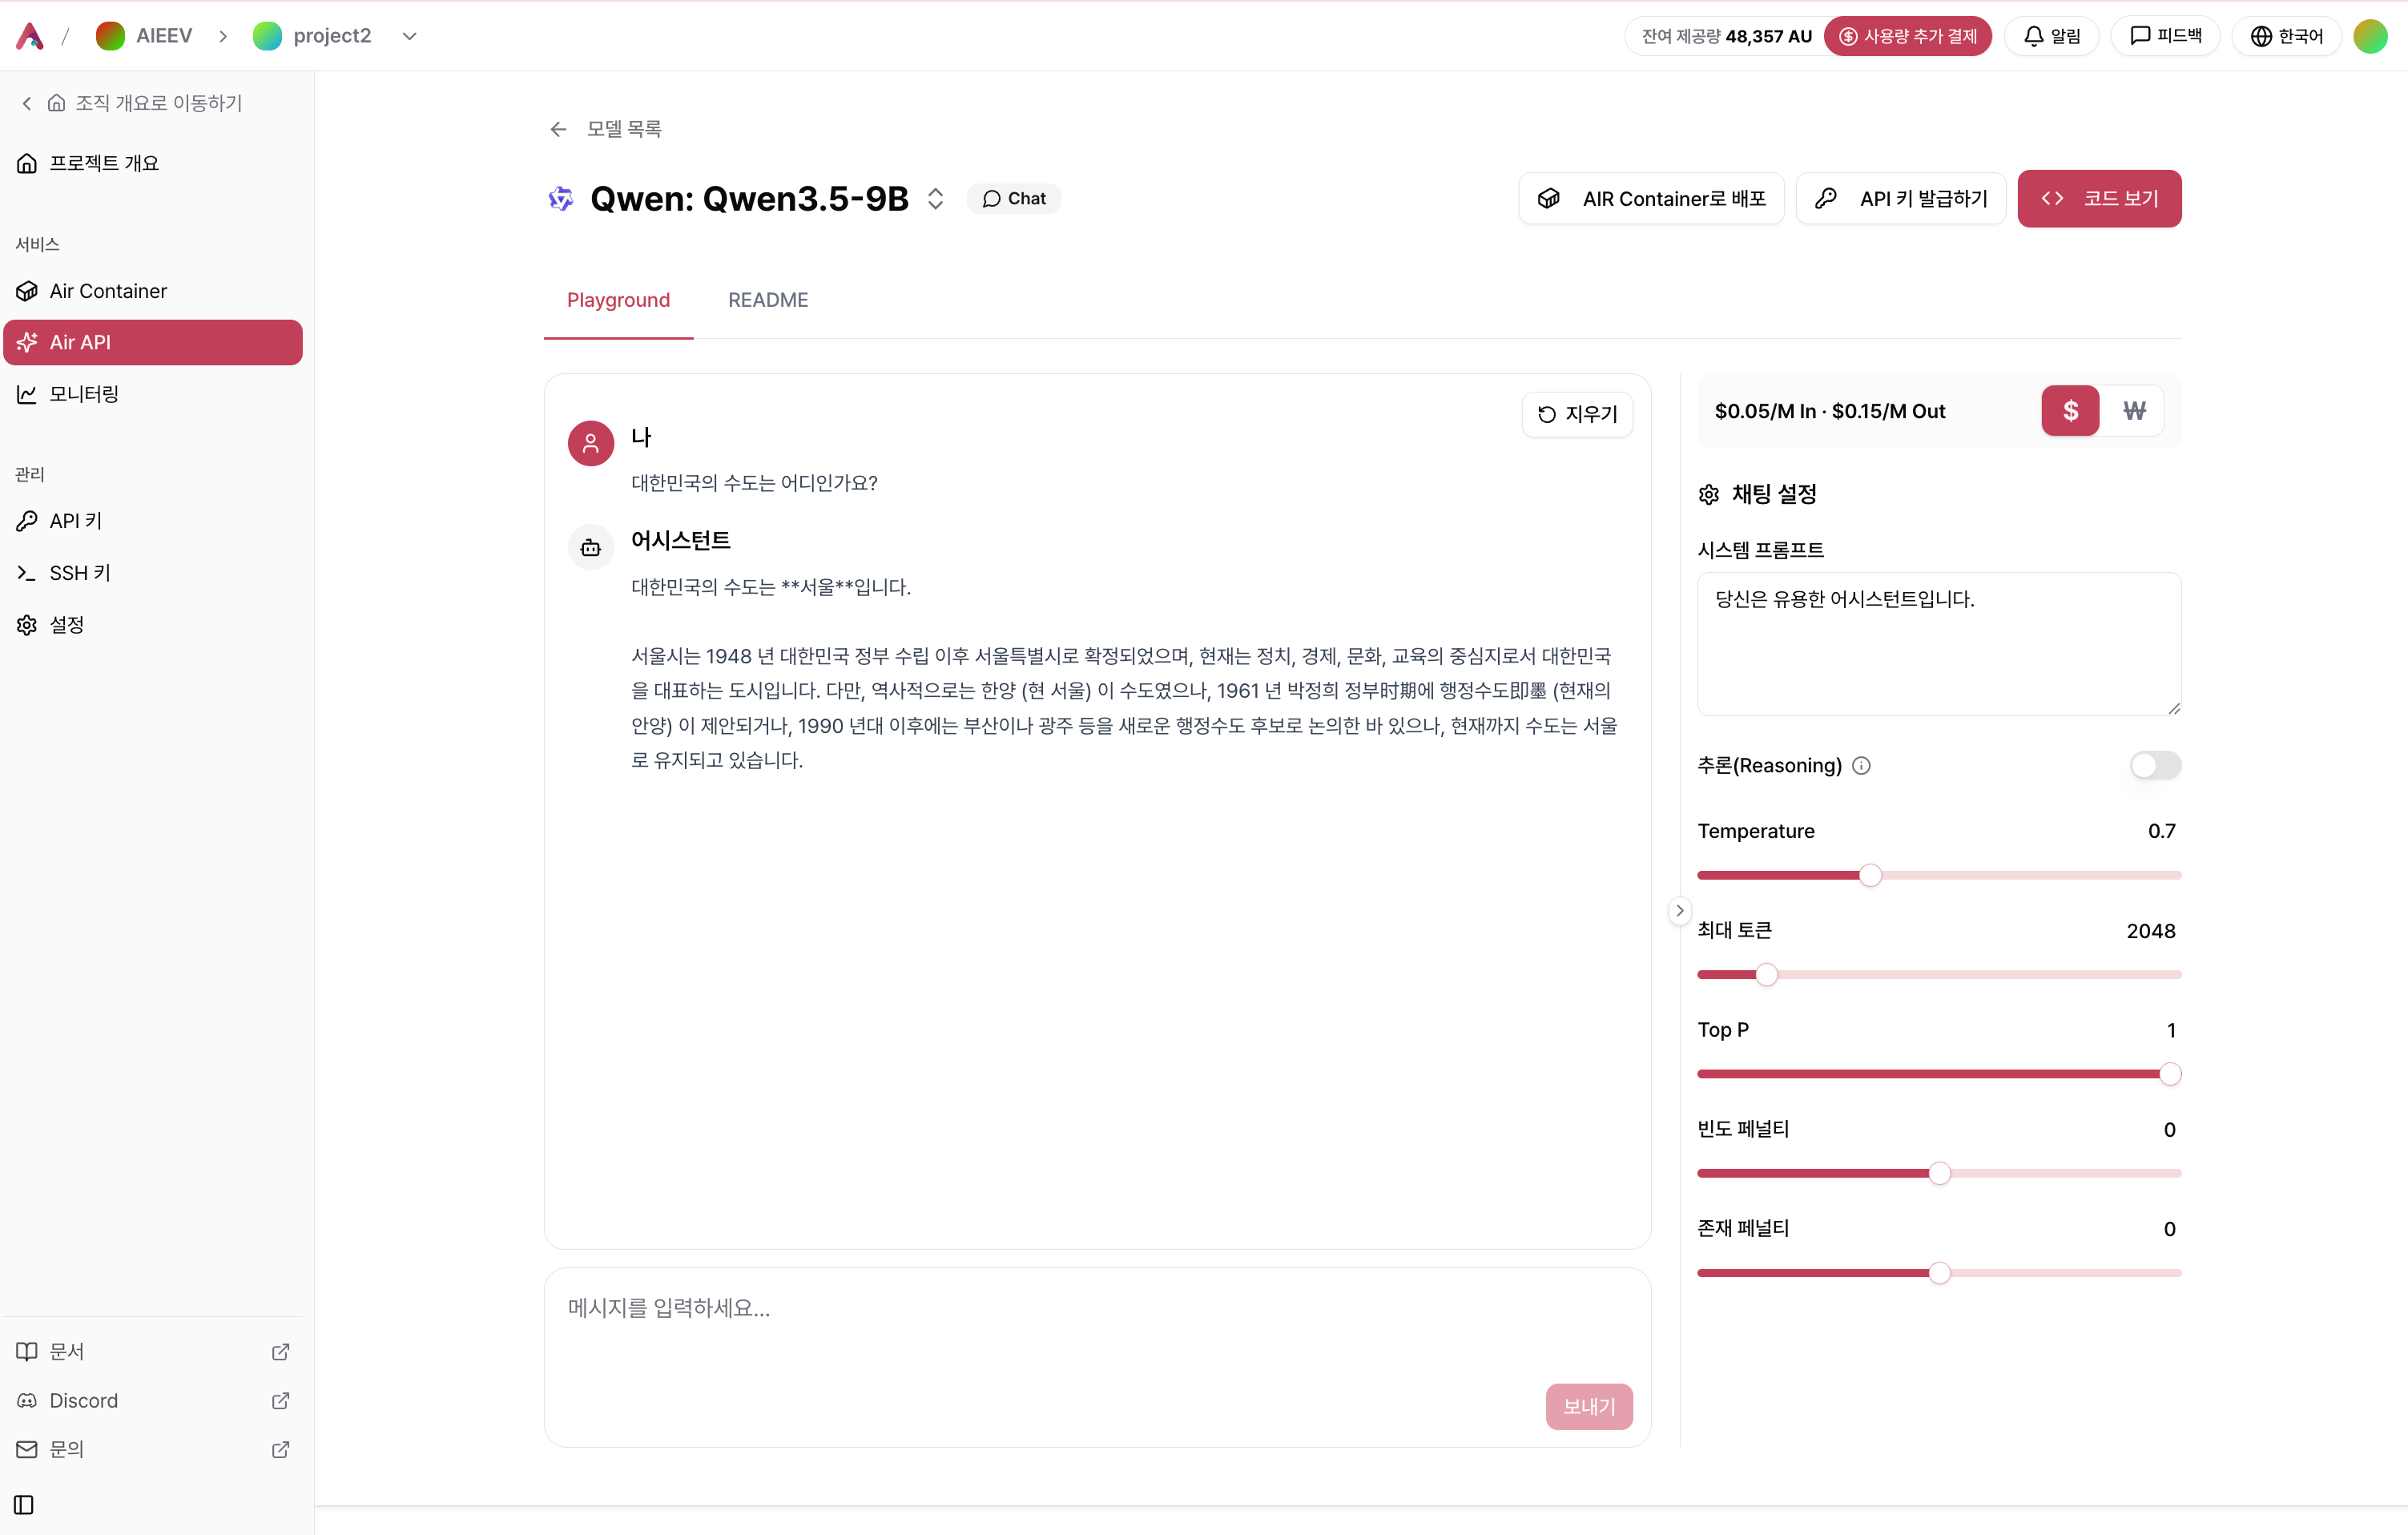
키를 발급받은 뒤 원하는 모델 카드로 이동해 우측 상단의 **코드 보기** 를 클릭합니다. `your-api-key` 위치에 시크릿 키를 입력하고 연결 테스트를 진행합니다.
### 5. Playground에서 테스트
Playground를 선택하면 Web UI에서 직접 모델 테스트를 진행할 수 있습니다. 동일한 설정으로 Air Container 배포로 전환할 수 있어, latency나 GPU 스펙이 중요한 경우 안정적인 환경으로 확장할 수 있습니다.
시크릿 키는 생성 이후 다시 확인할 수 없습니다. 반드시 복사해 안전하게 보관하세요.
### 4. 코드 샘플로 연결 테스트
키를 발급받은 뒤 원하는 모델 카드로 이동해 우측 상단의 **코드 보기** 를 클릭합니다. `your-api-key` 위치에 시크릿 키를 입력하고 연결 테스트를 진행합니다.
### 5. Playground에서 테스트
Playground를 선택하면 Web UI에서 직접 모델 테스트를 진행할 수 있습니다. 동일한 설정으로 Air Container 배포로 전환할 수 있어, latency나 GPU 스펙이 중요한 경우 안정적인 환경으로 확장할 수 있습니다.
 ## 다음에 읽으면 좋은 문서
지원 모델 확인 및 Playground 기반 테스트 흐름을 안내합니다.
API 호출 방법, 키 사용, 운영 시 주의사항을 정리합니다.
자주 발생하는 오류와 해결 방법을 확인합니다.
## 다음에 읽으면 좋은 문서
지원 모델 확인 및 Playground 기반 테스트 흐름을 안내합니다.
API 호출 방법, 키 사용, 운영 시 주의사항을 정리합니다.
자주 발생하는 오류와 해결 방법을 확인합니다.