> ## Documentation Index
> Fetch the complete documentation index at: https://docs.aieev.com/llms.txt
> Use this file to discover all available pages before exploring further.
# Deploy a Container
> Create and deploy an Air Container
Air Container supports two deployment methods:
* **Deploy from a Template** — Quickly deploy using a preconfigured template.
* **Create from Scratch** — Configure every deployment option manually.
## Before You Begin
Regardless of the deployment method, you'll configure the following settings during deployment.
| Item | Description |
| ---------------------- | ------------------------------------------------------------------------------------------------------------------------------------------------------------------------- |
| **Container Image** | The Docker image URL used to run your container. The registry provider is detected automatically from the image URL. |
| **Registry Access** | Public images can be pulled without authentication. Private registries require a username and password (or access token). |
| **GPU** | The GPU model assigned to the container. Available VRAM, system memory, vCPUs, and hourly pricing vary by GPU type. |
| **Replicas** | The number of container replicas to run concurrently. When Autoscaling is enabled,
AirCloud automatically scales between the configured minimum and maximum values. |
| **Persistent Storage** | Persistent storage that remains available even if the container is stopped or restarted.
Up to **30 GB** can be allocated. |
| **Tags** | Optional labels used to organize and filter containers. |
### 1. Select a Project
From the Organization Overview, open the Project where you want to deploy the container.
### 2. Start Creating a Container
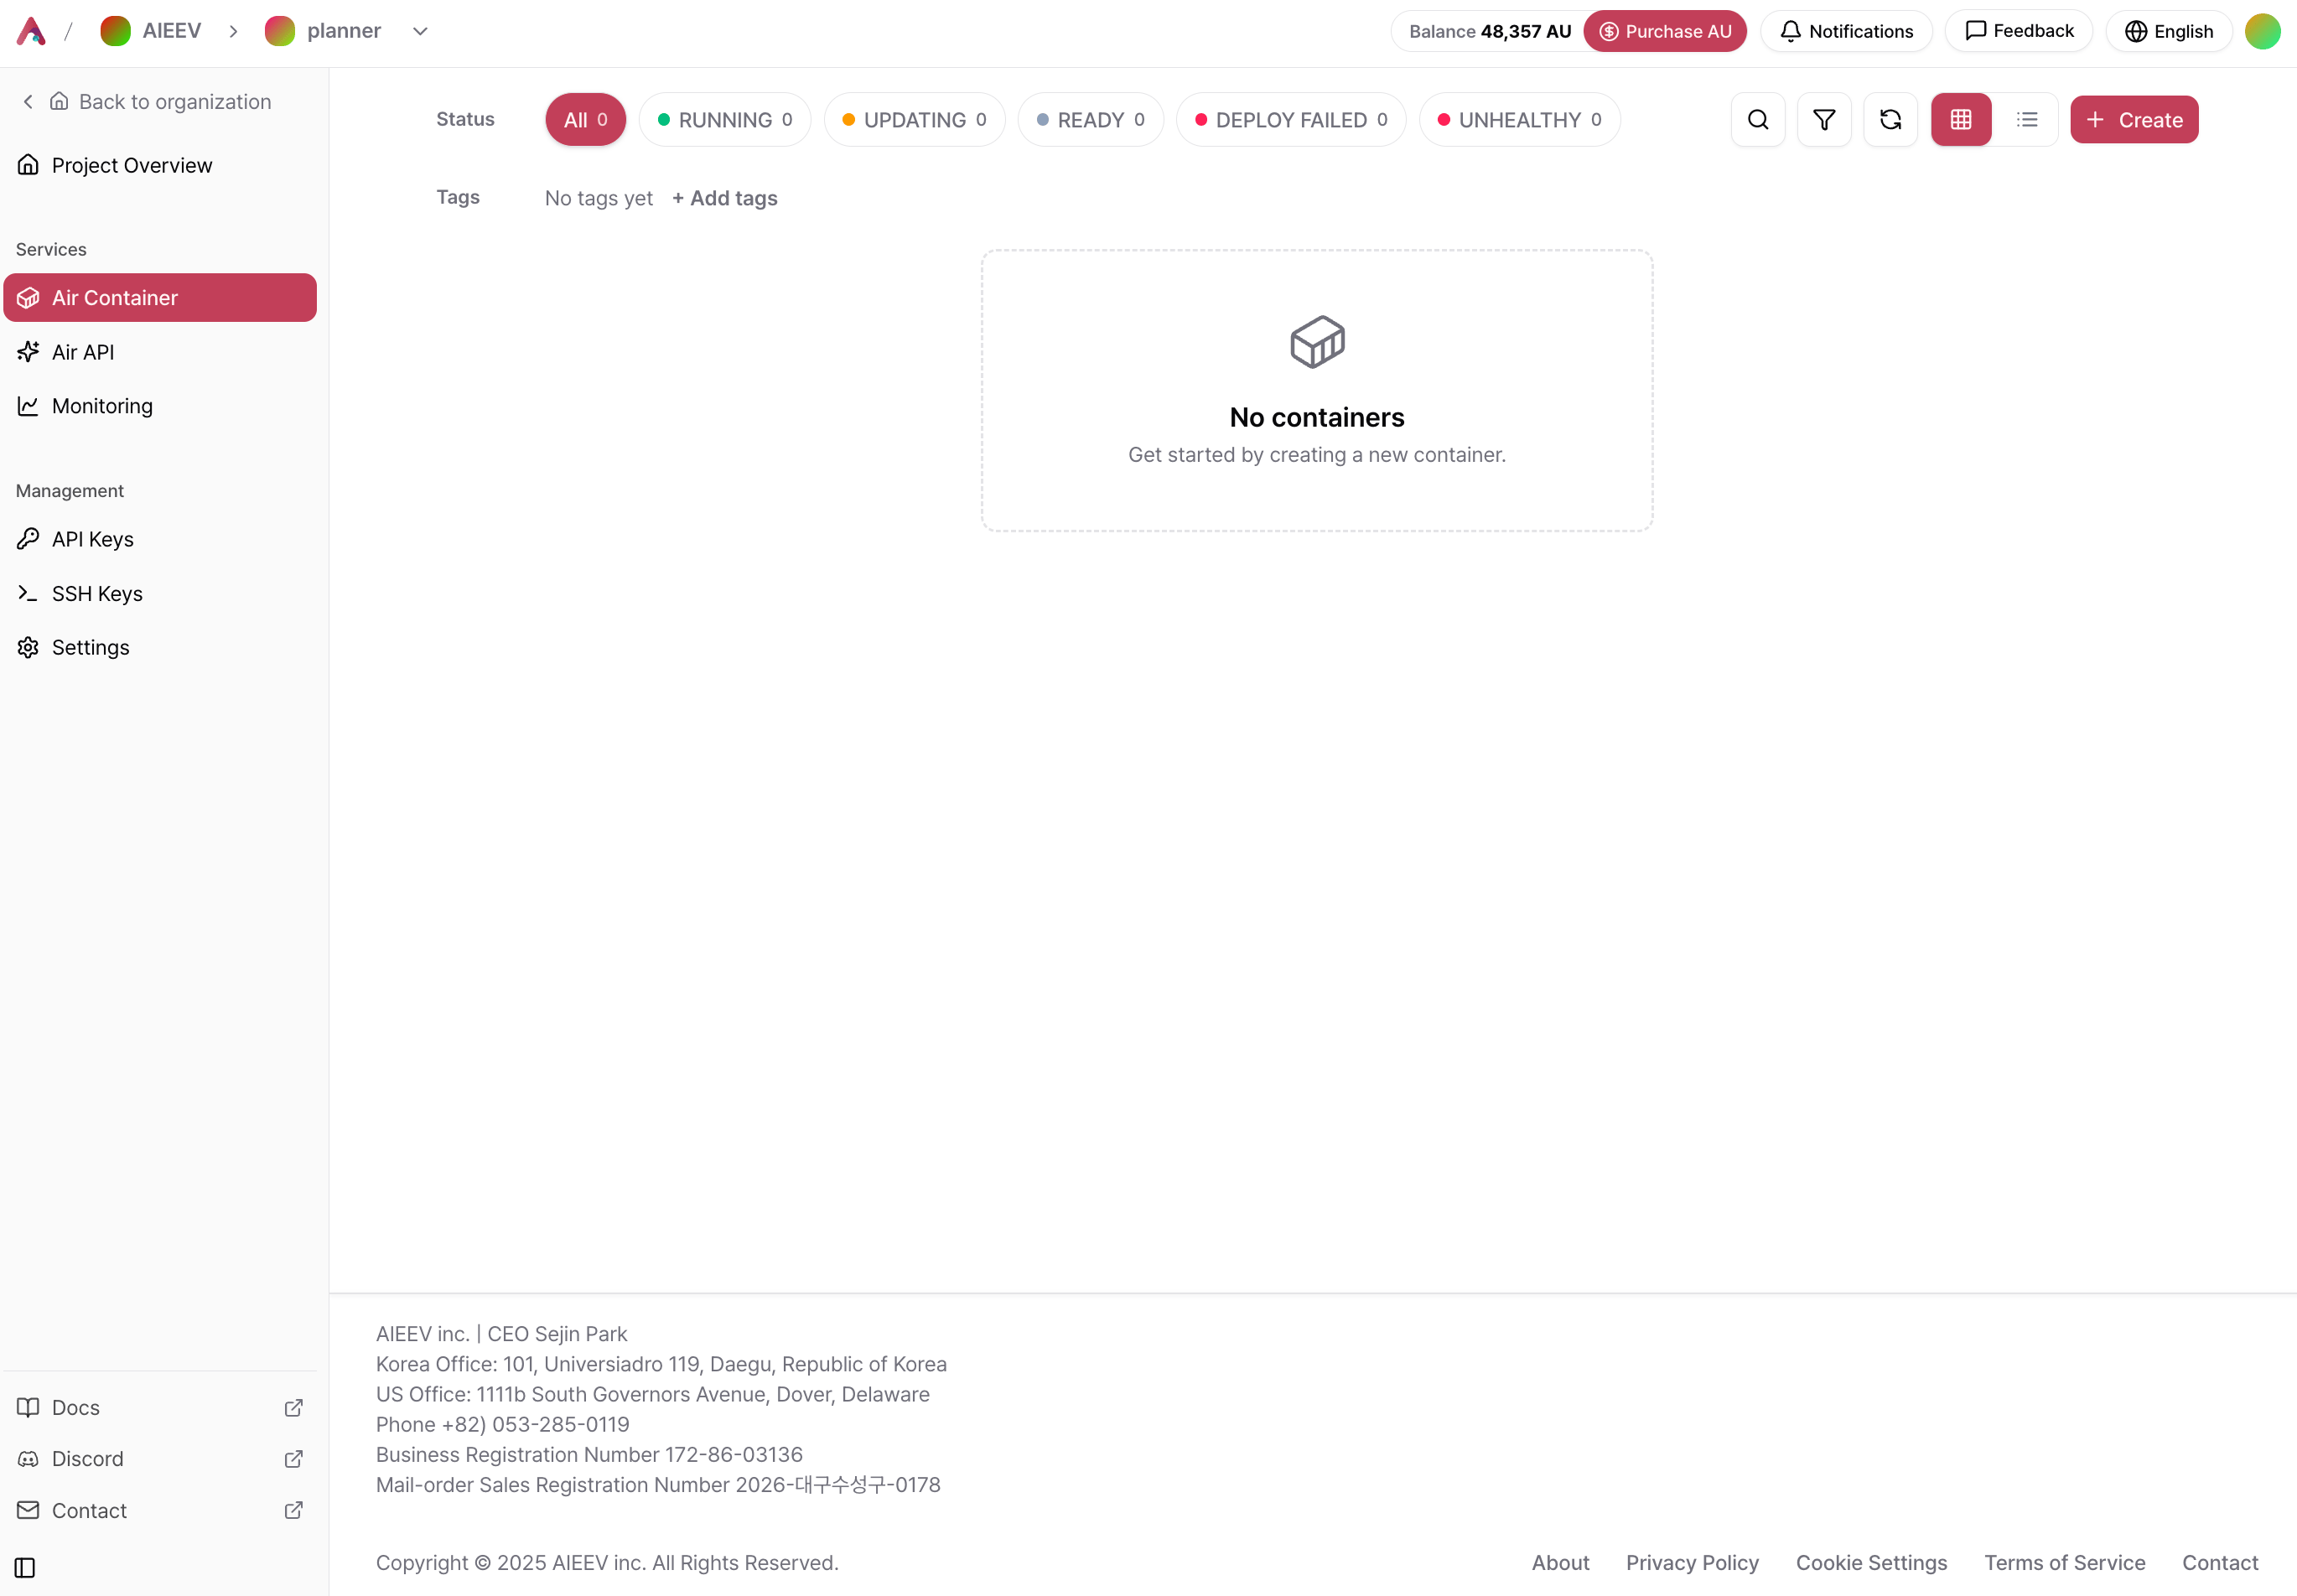
From the **Air Container** page, click **+ Create** in the upper-right corner.
 ### 3. Choose a Deployment Method
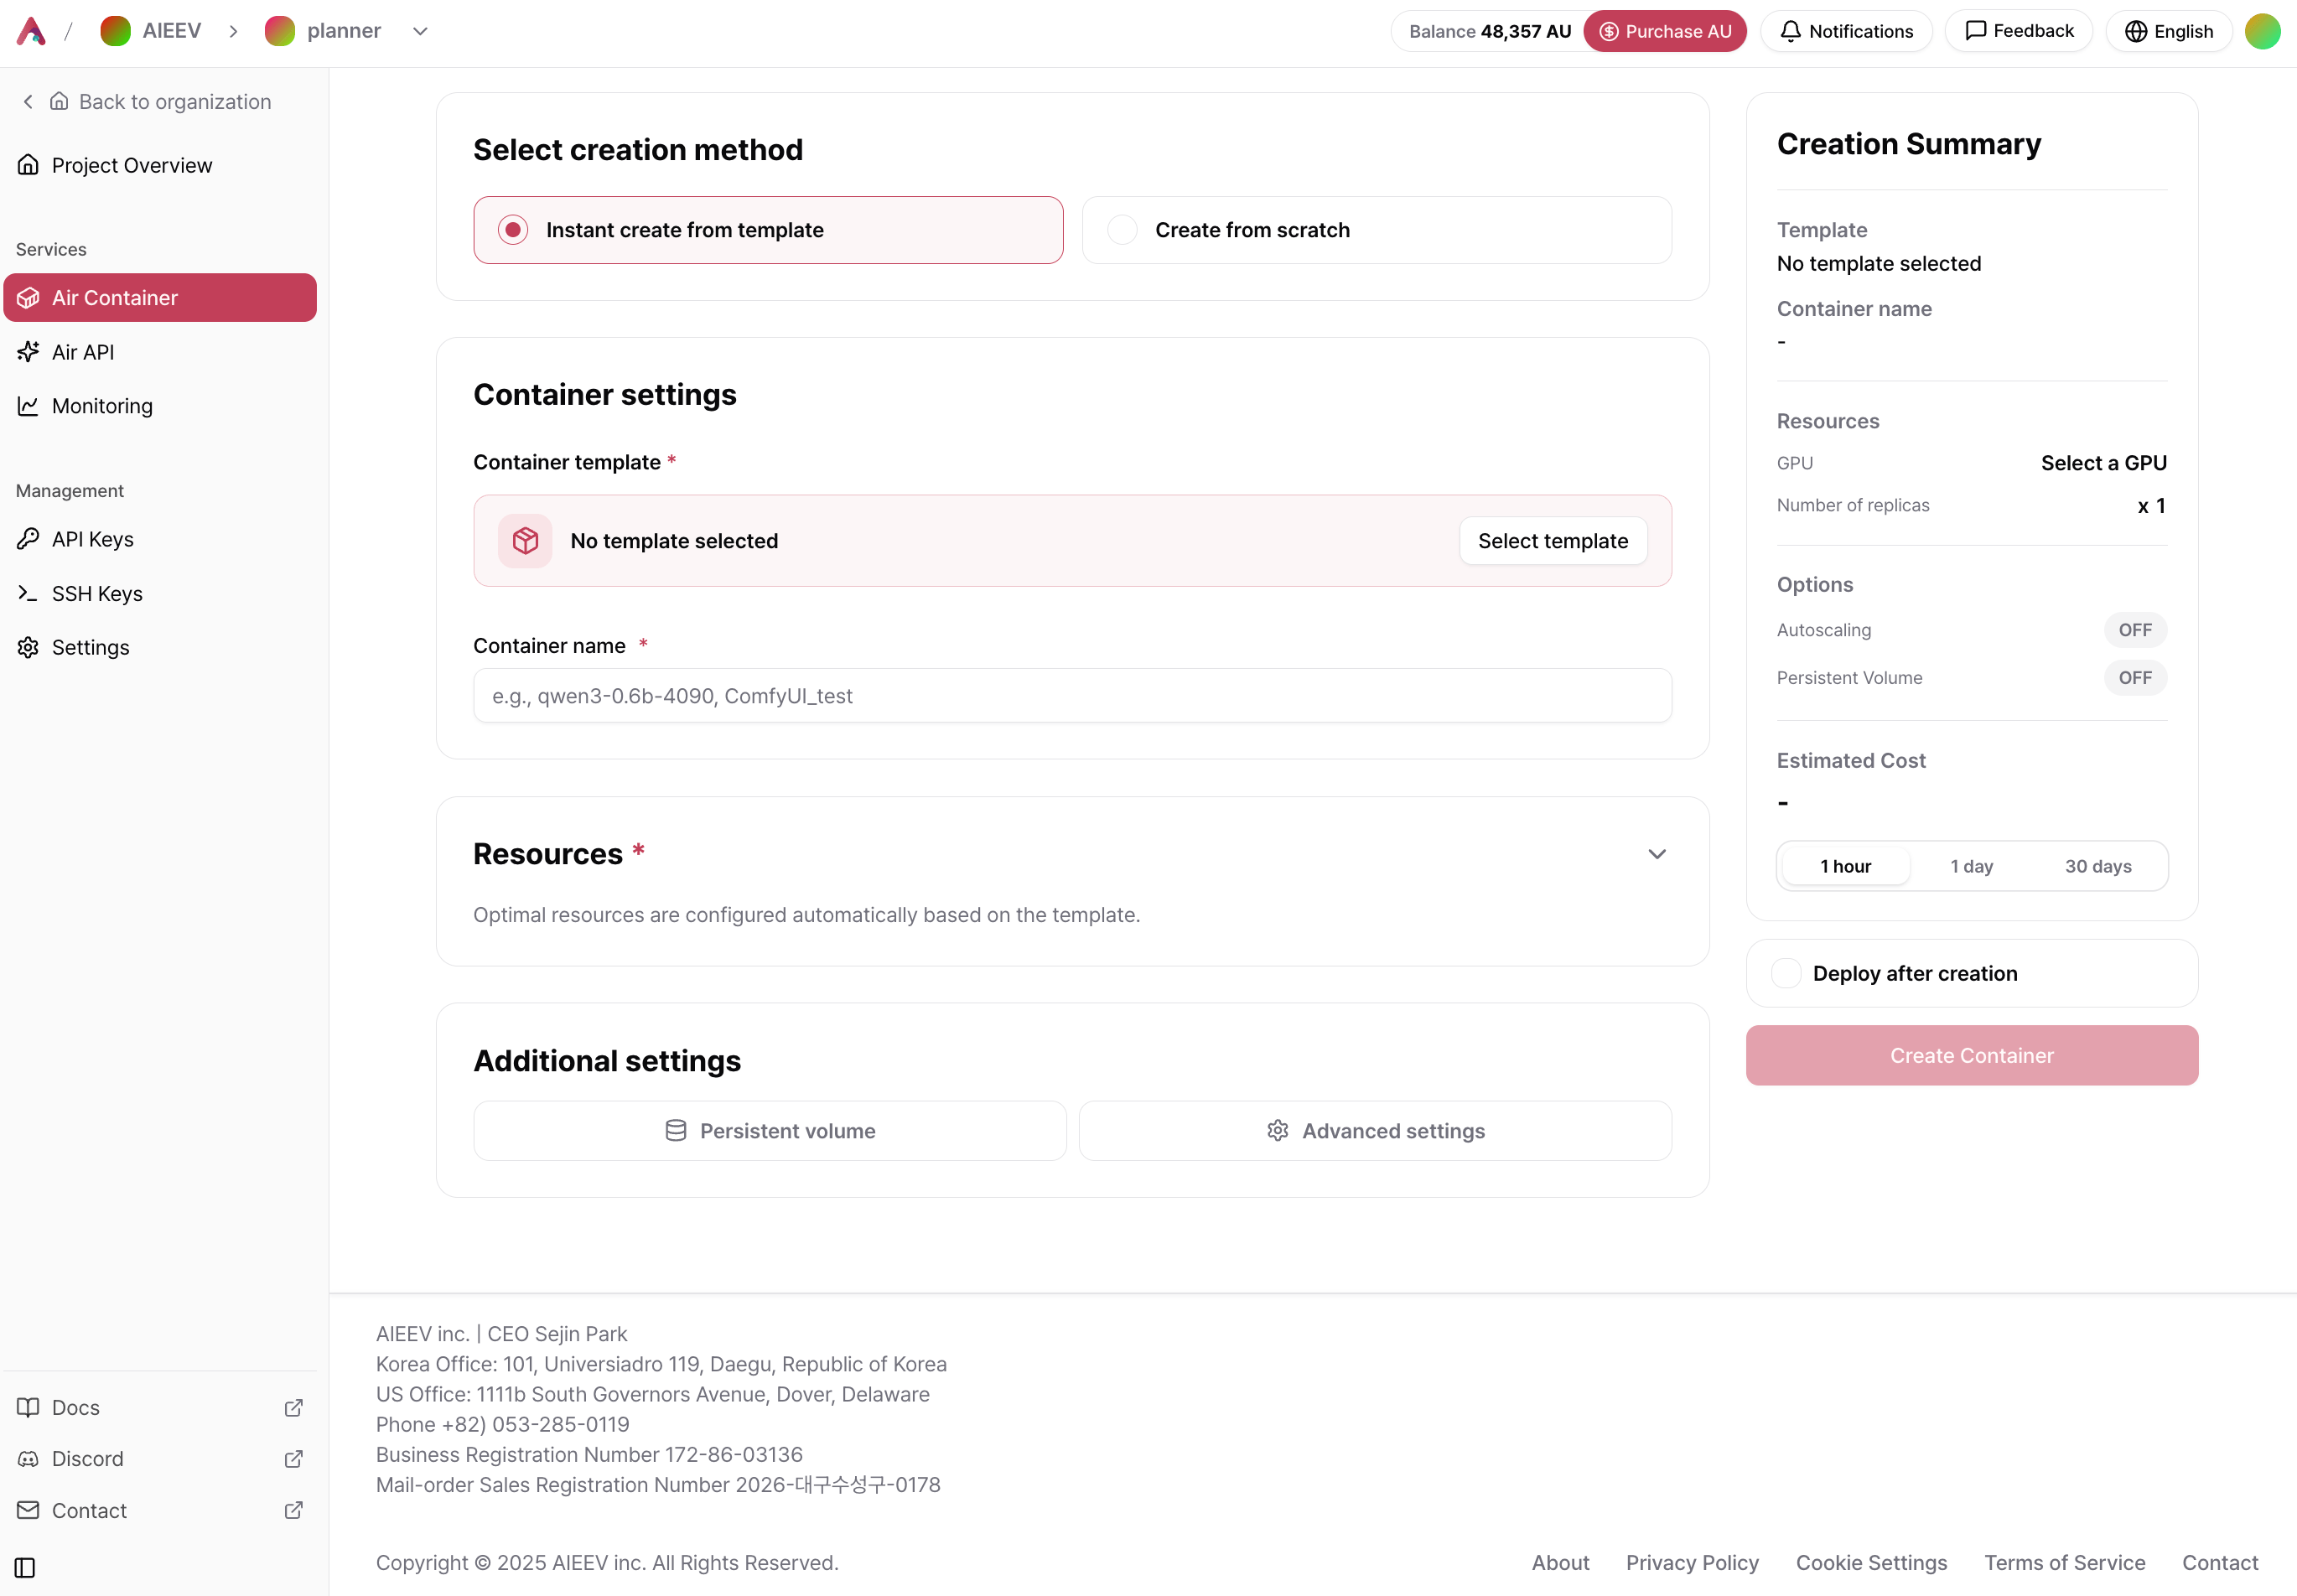
Select how you want to create your container.
### 3. Choose a Deployment Method
Select how you want to create your container.
 | Deployment Method | Description |
| -------------------------- | ---------------------------------------------------------------------------------------------------------------------------------- |
| **Deploy from a Template** | Quickly deploy using a preconfigured template. The container image, ports, and environment variables are configured automatically. |
| **Create from Scratch** | Configure the container image and all deployment settings manually. |
***
## Deploy from a Template
### 1. Select a Template
Click **Select Template** and choose the template you want to use.
| Deployment Method | Description |
| -------------------------- | ---------------------------------------------------------------------------------------------------------------------------------- |
| **Deploy from a Template** | Quickly deploy using a preconfigured template. The container image, ports, and environment variables are configured automatically. |
| **Create from Scratch** | Configure the container image and all deployment settings manually. |
***
## Deploy from a Template
### 1. Select a Template
Click **Select Template** and choose the template you want to use.
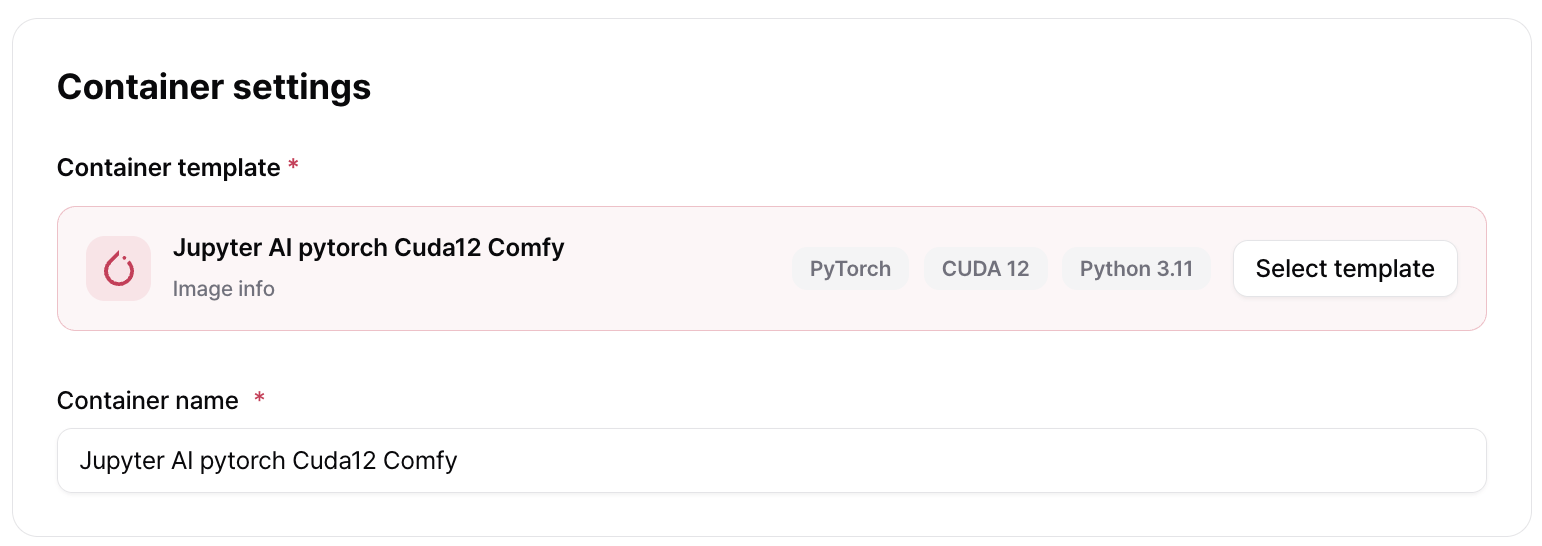
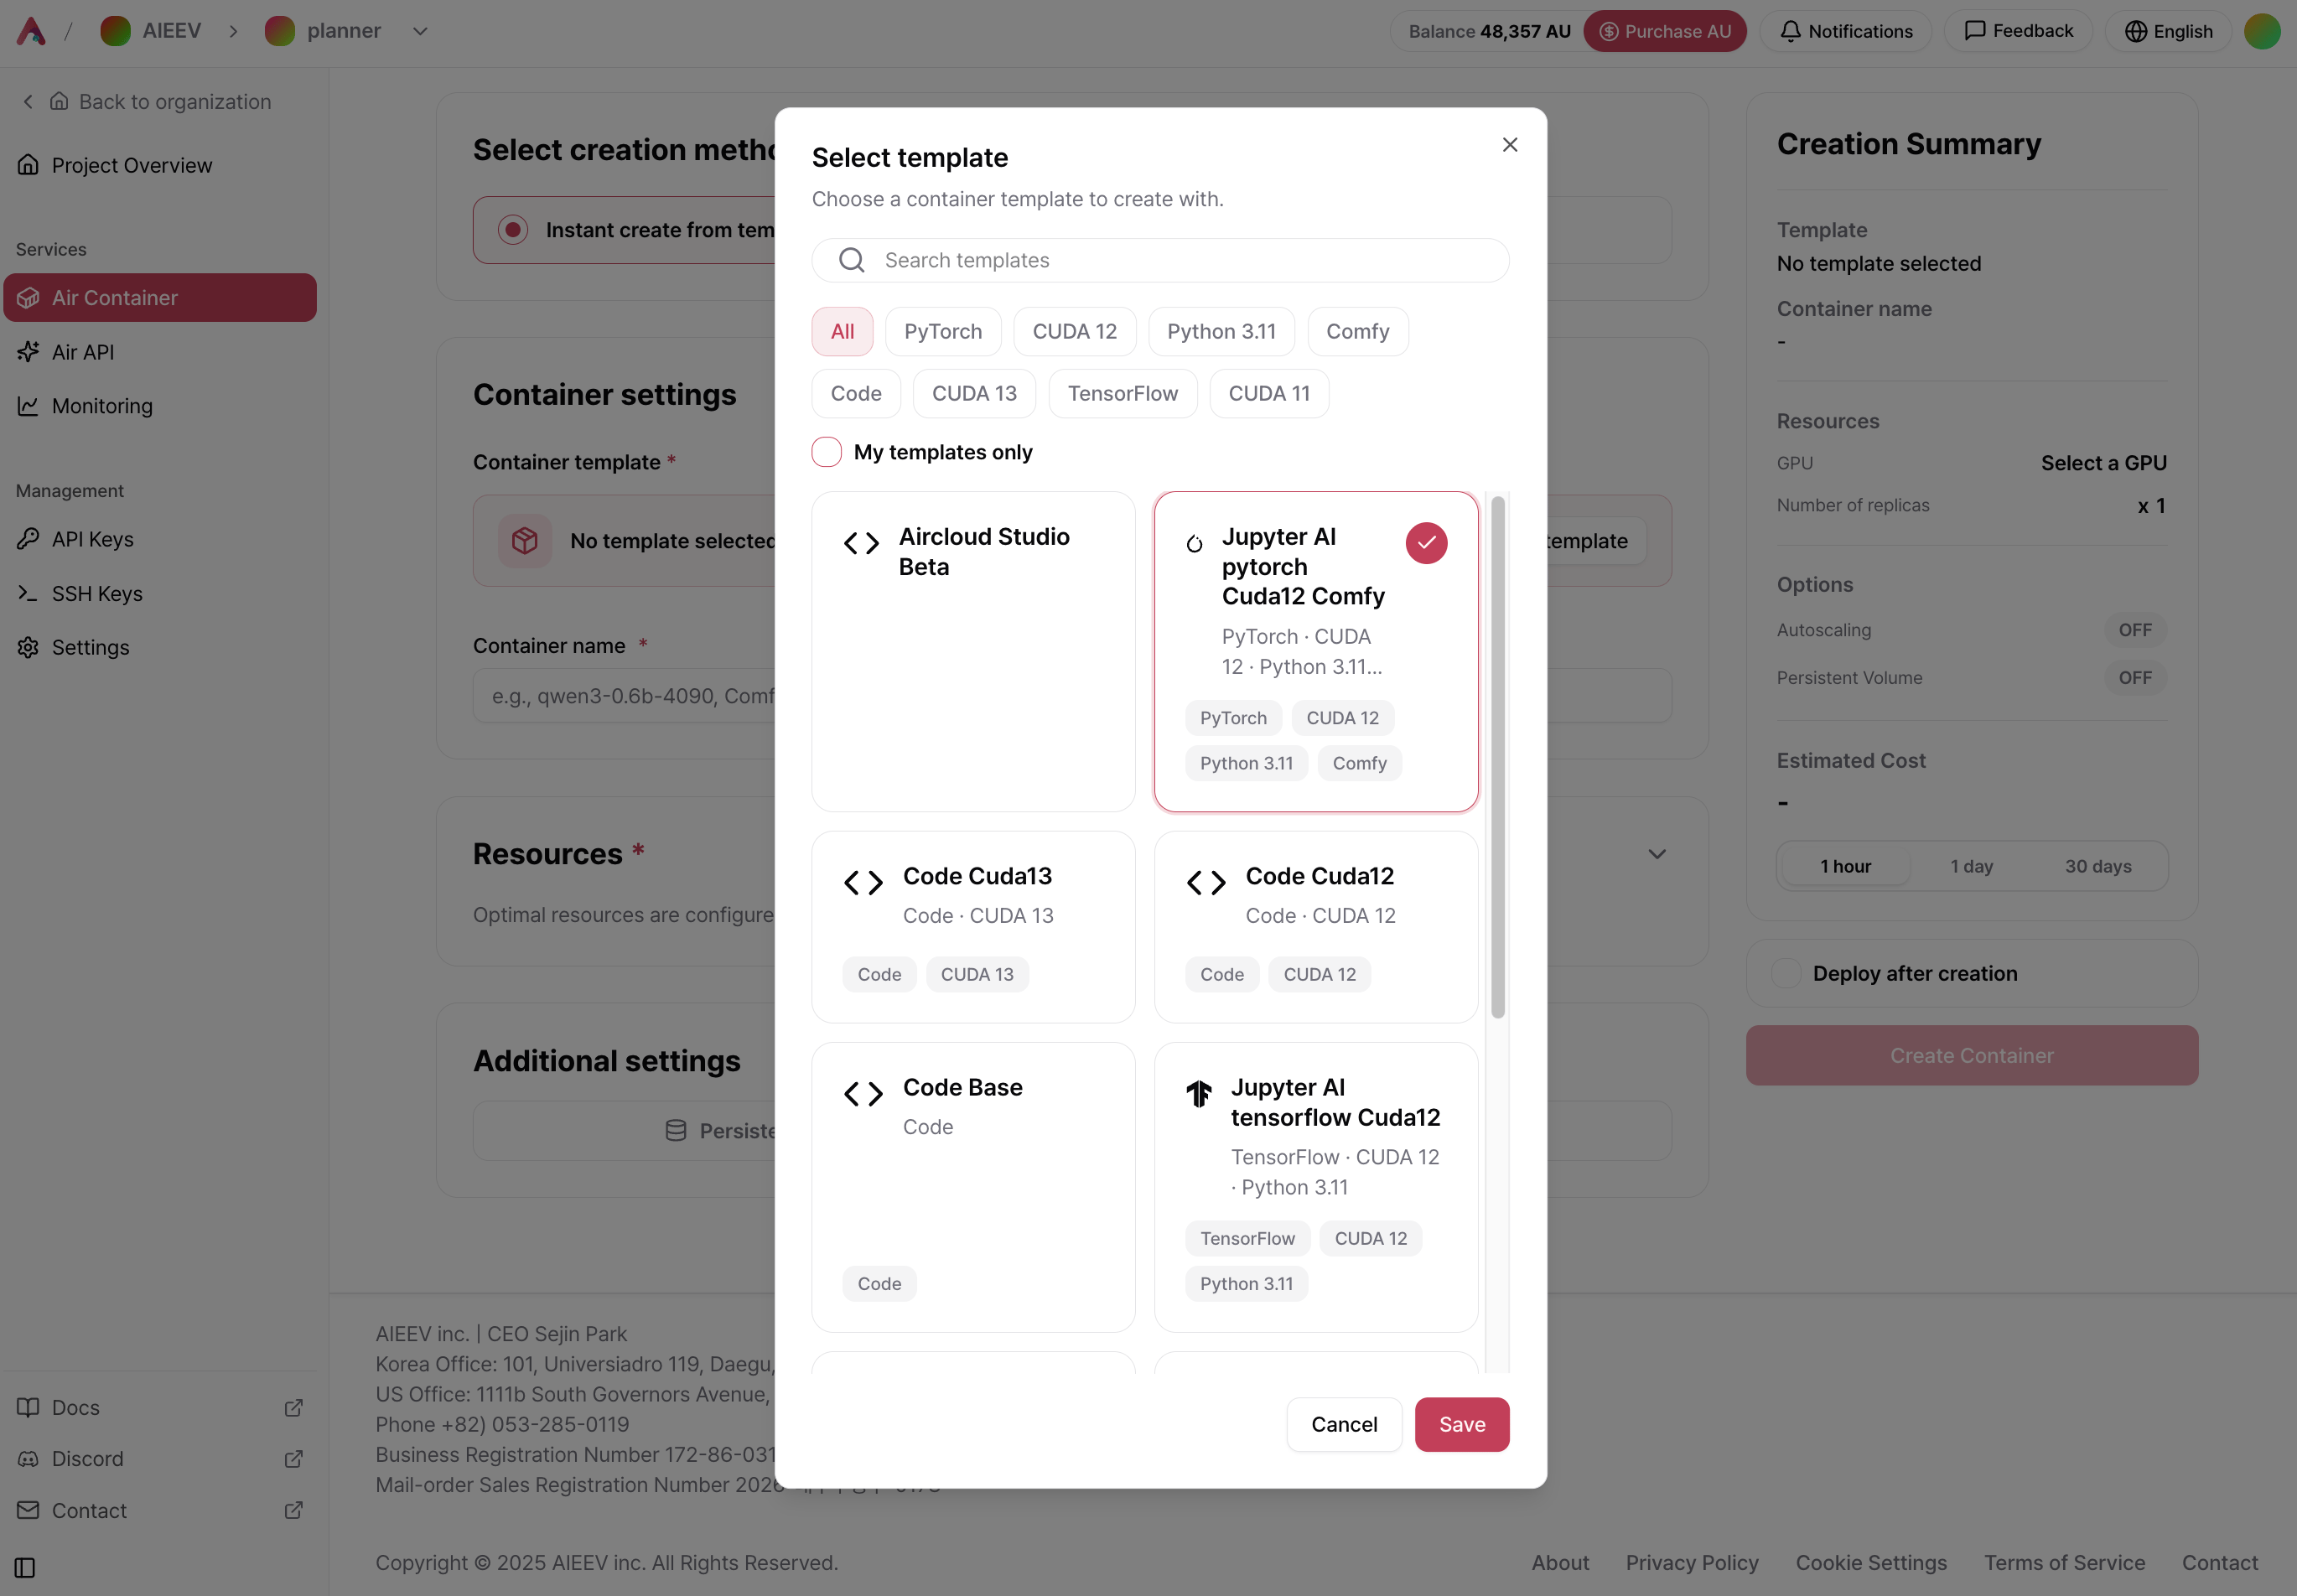 After saving, the selected template is applied automatically, and the container name is initialized using the template name. You can change the container name at any time.
 ### 2. Configure Resources
Expand the **Resources** section to select the infrastructure option and GPU model.
### 2. Configure Resources
Expand the **Resources** section to select the infrastructure option and GPU model.
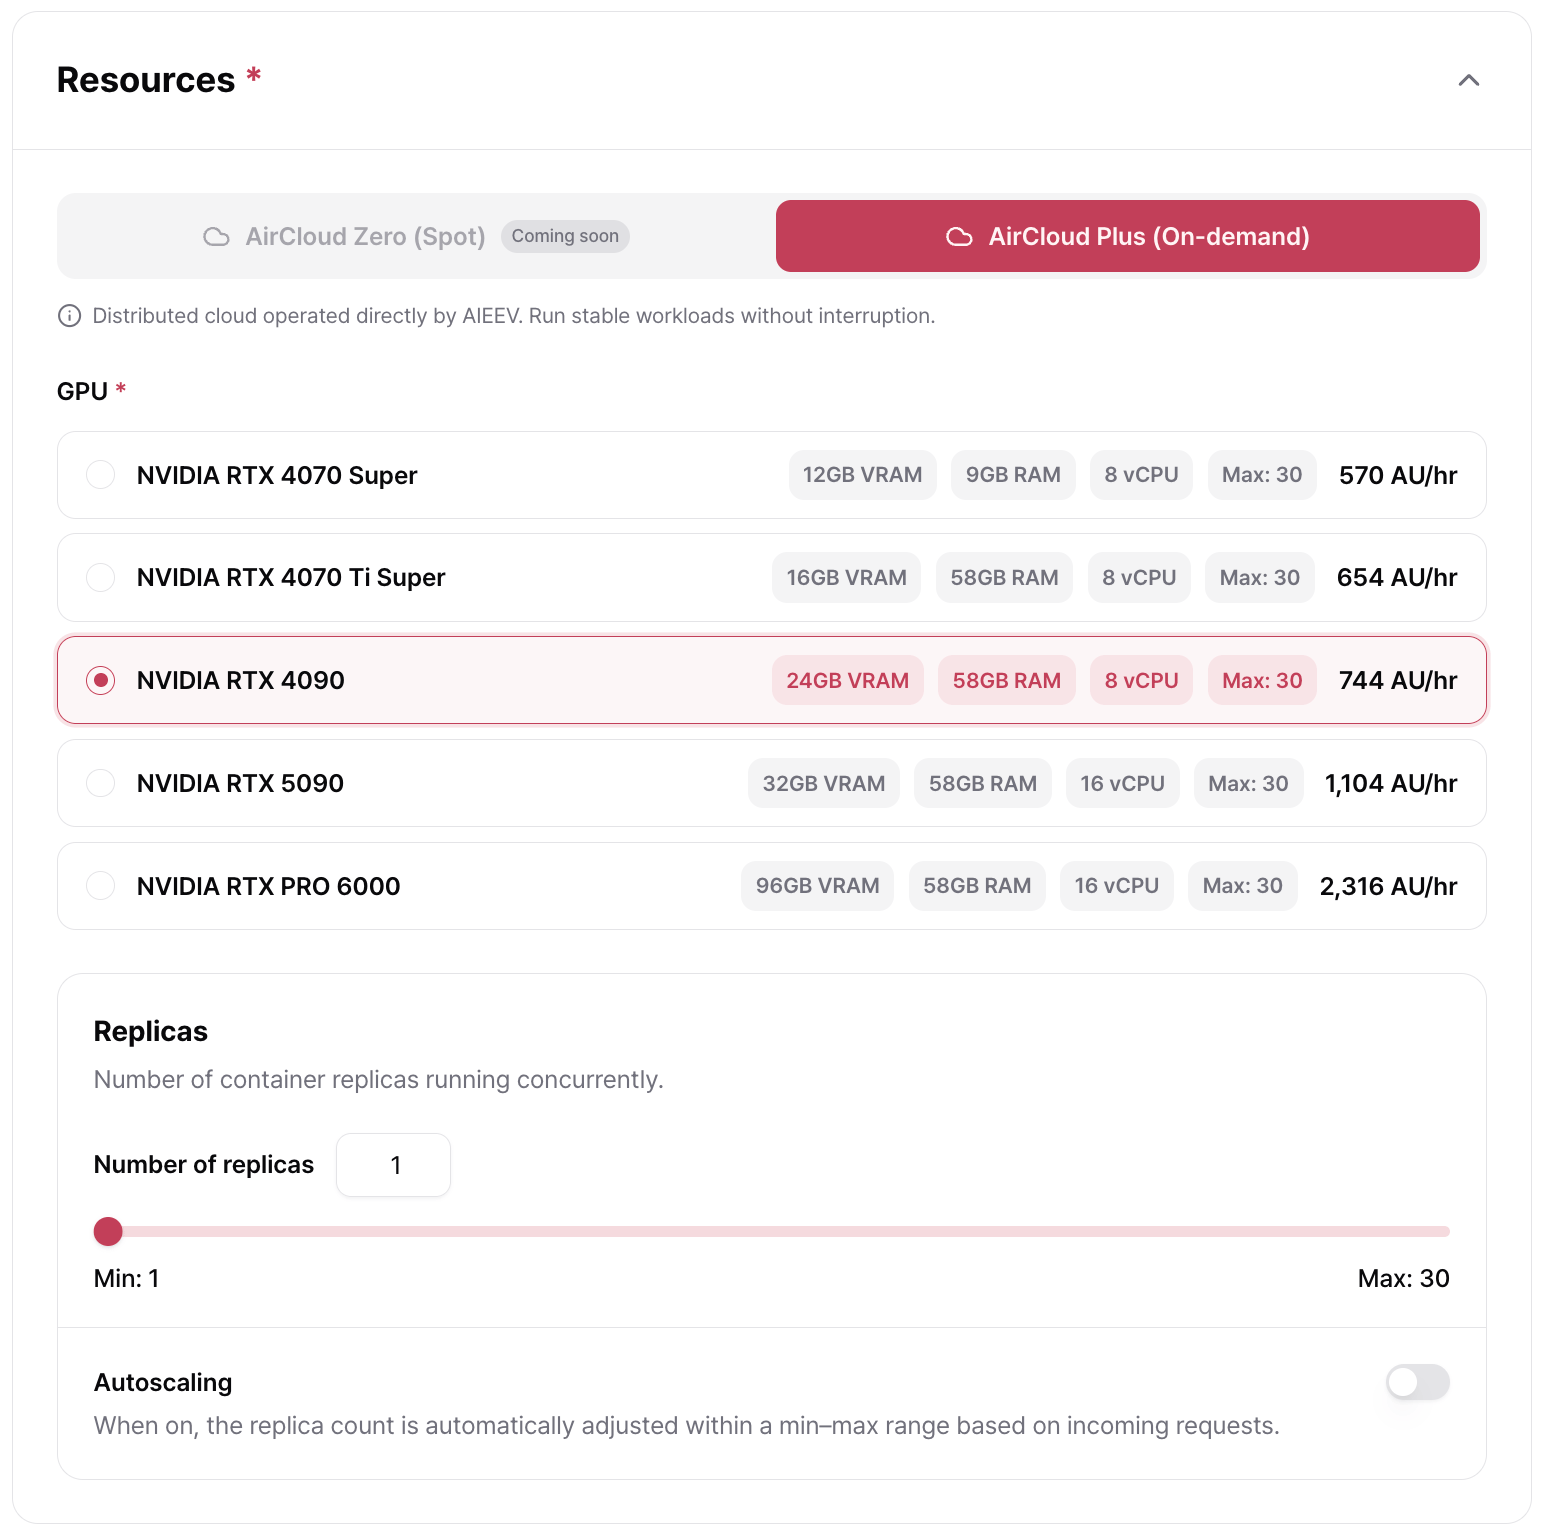 #### Infrastructure Options
| Option | Description |
| ----------------------------- | -------------------------------------------------------------------------------------------------------------- |
| **AirCloud Zero (Spot)** | Coming soon. |
| **AirCloud Plus (On-demand)** | Dedicated distributed cloud infrastructure operated by AIEEV, providing stable workloads without interruption. |
#### Select a GPU
Each GPU option displays its available VRAM, system memory, vCPUs, maximum number of replicas, and hourly cost (AU/hr).
#### Configure Replicas
Replicas determine how many copies of your container run simultaneously. Adjust the desired number using the slider.
#### Infrastructure Options
| Option | Description |
| ----------------------------- | -------------------------------------------------------------------------------------------------------------- |
| **AirCloud Zero (Spot)** | Coming soon. |
| **AirCloud Plus (On-demand)** | Dedicated distributed cloud infrastructure operated by AIEEV, providing stable workloads without interruption. |
#### Select a GPU
Each GPU option displays its available VRAM, system memory, vCPUs, maximum number of replicas, and hourly cost (AU/hr).
#### Configure Replicas
Replicas determine how many copies of your container run simultaneously. Adjust the desired number using the slider.
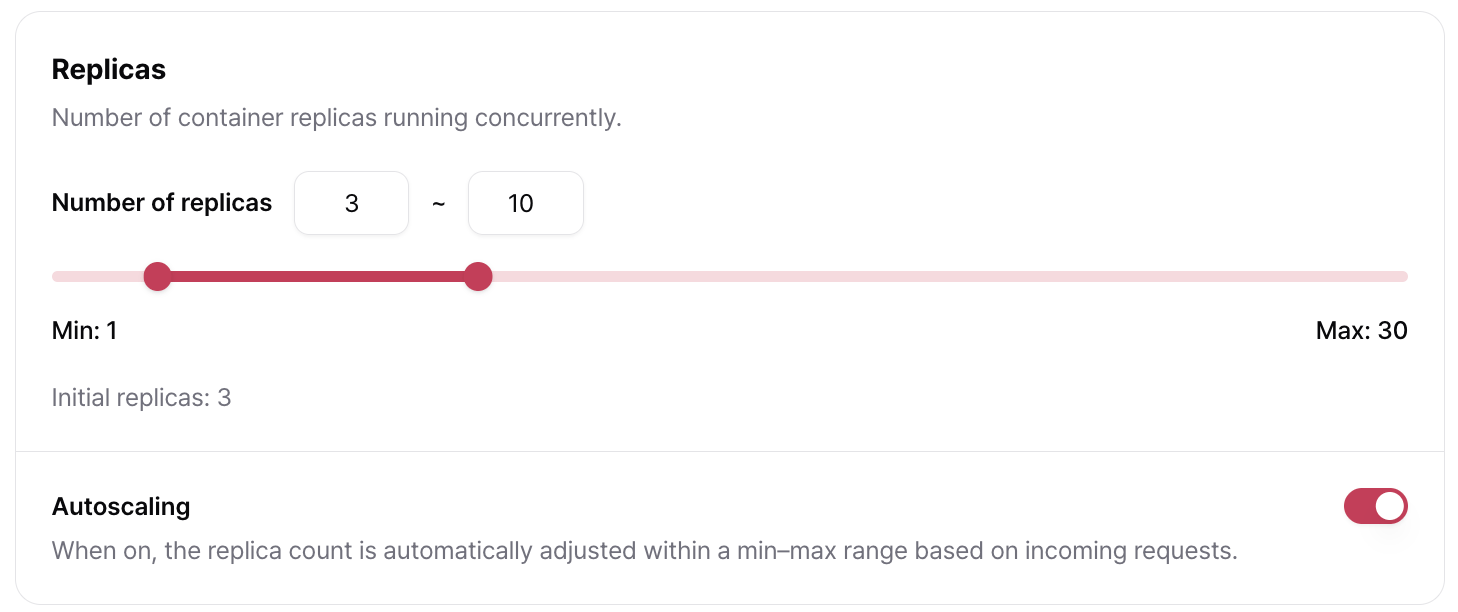 When Autoscaling is enabled, AirCloud automatically adjusts the number of replicas within the configured minimum and maximum range.
For more information, see [Autoscaling and Scheduled Scaling](/docs/air-container/autoscaling-and-scheduling).
* The number of Replicas is limited by your account quota. If you need additional quota, please contact your administrator.
* If sufficient quota is available but the selected GPU is temporarily unavailable, you can join the waitlist. Resources will be allocated automatically as GPUs become available.
### 3. Additional Settings (Optional)
When deploying from a template, **Persistent Storage** and **Advanced Settings** are preconfigured. You can modify these settings as needed.
#### Persistent Storage
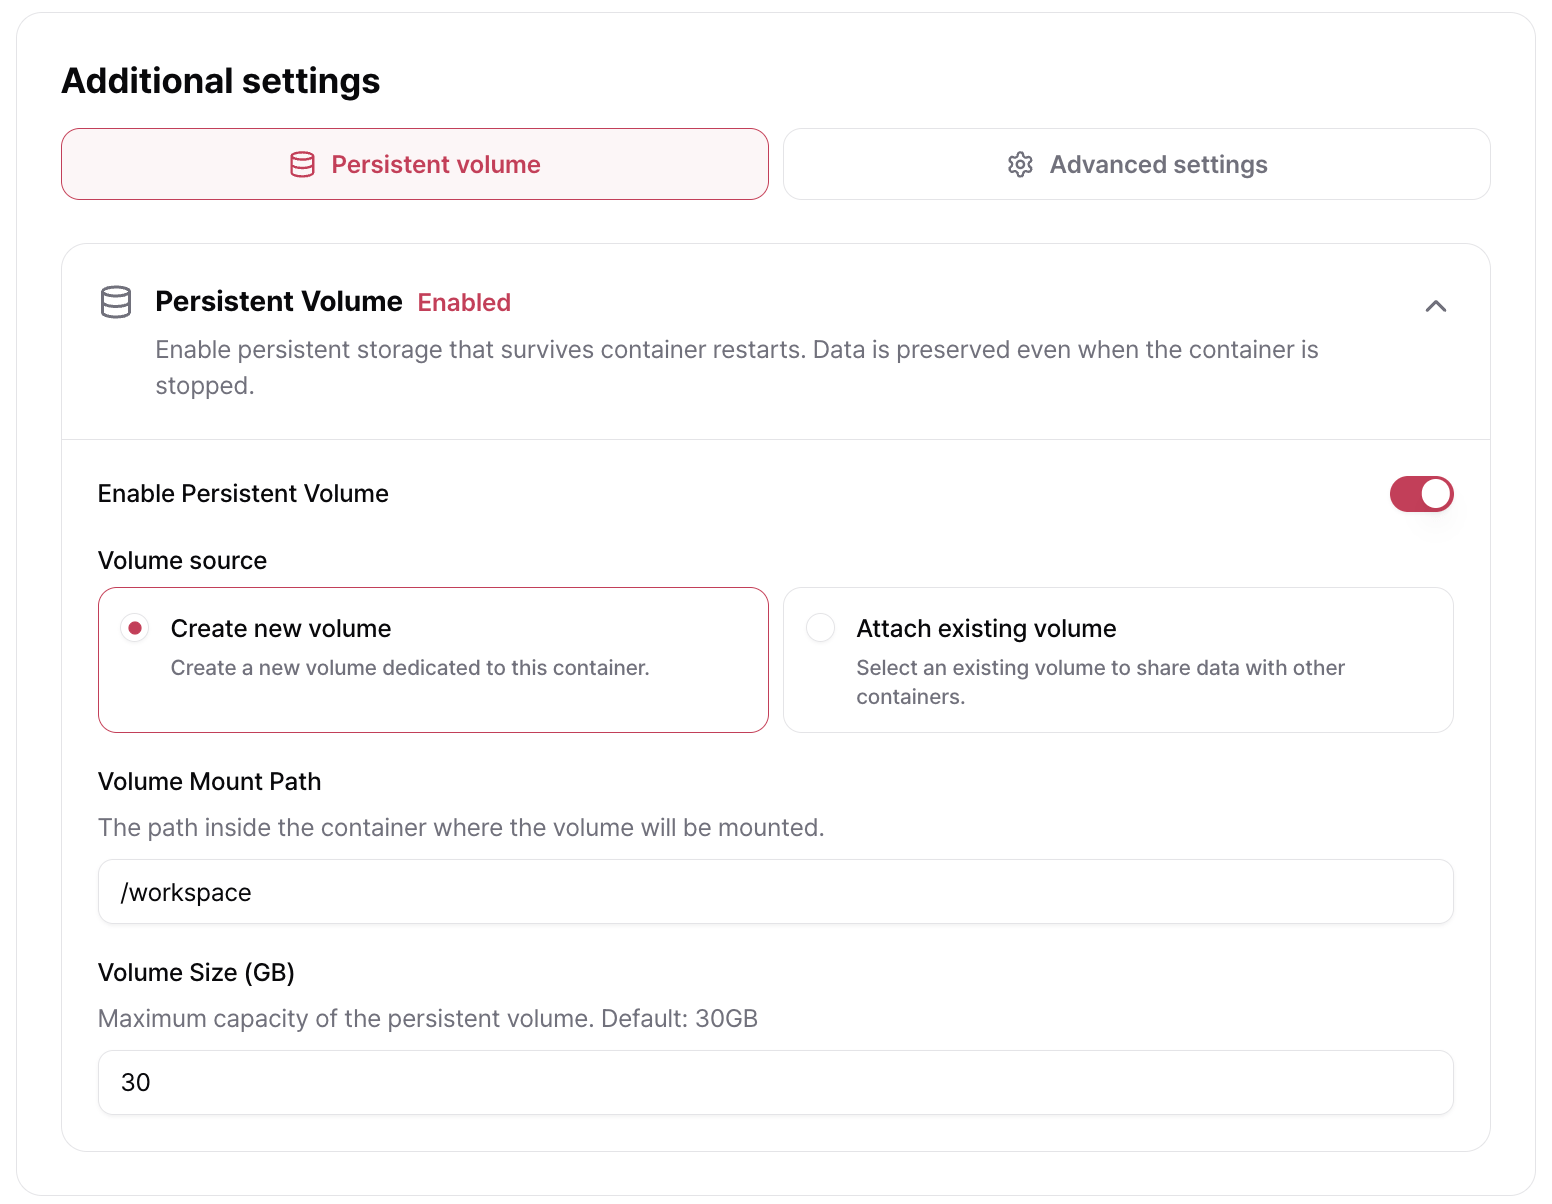
Persistent Storage preserves your data even if the container is stopped or restarted.
For more information, see [Persistent Storage](/docs/air-container/shared-storage).
When Autoscaling is enabled, AirCloud automatically adjusts the number of replicas within the configured minimum and maximum range.
For more information, see [Autoscaling and Scheduled Scaling](/docs/air-container/autoscaling-and-scheduling).
* The number of Replicas is limited by your account quota. If you need additional quota, please contact your administrator.
* If sufficient quota is available but the selected GPU is temporarily unavailable, you can join the waitlist. Resources will be allocated automatically as GPUs become available.
### 3. Additional Settings (Optional)
When deploying from a template, **Persistent Storage** and **Advanced Settings** are preconfigured. You can modify these settings as needed.
#### Persistent Storage
Persistent Storage preserves your data even if the container is stopped or restarted.
For more information, see [Persistent Storage](/docs/air-container/shared-storage).
 | Item | Description |
| ----------------- | --------------------------------------------------------------------------------------------------------------------------------------- |
| **Volume Source** | **Create New Volume** creates a dedicated volume for this container. **Attach Existing Volume** shares a volume with another container. |
| **Mount Path** | The directory inside the container where the volume is mounted. Default: `/workspace`. |
| **Capacity (GB)** | Maximum storage capacity. Default: **30 GB**. |
#### Advanced Settings
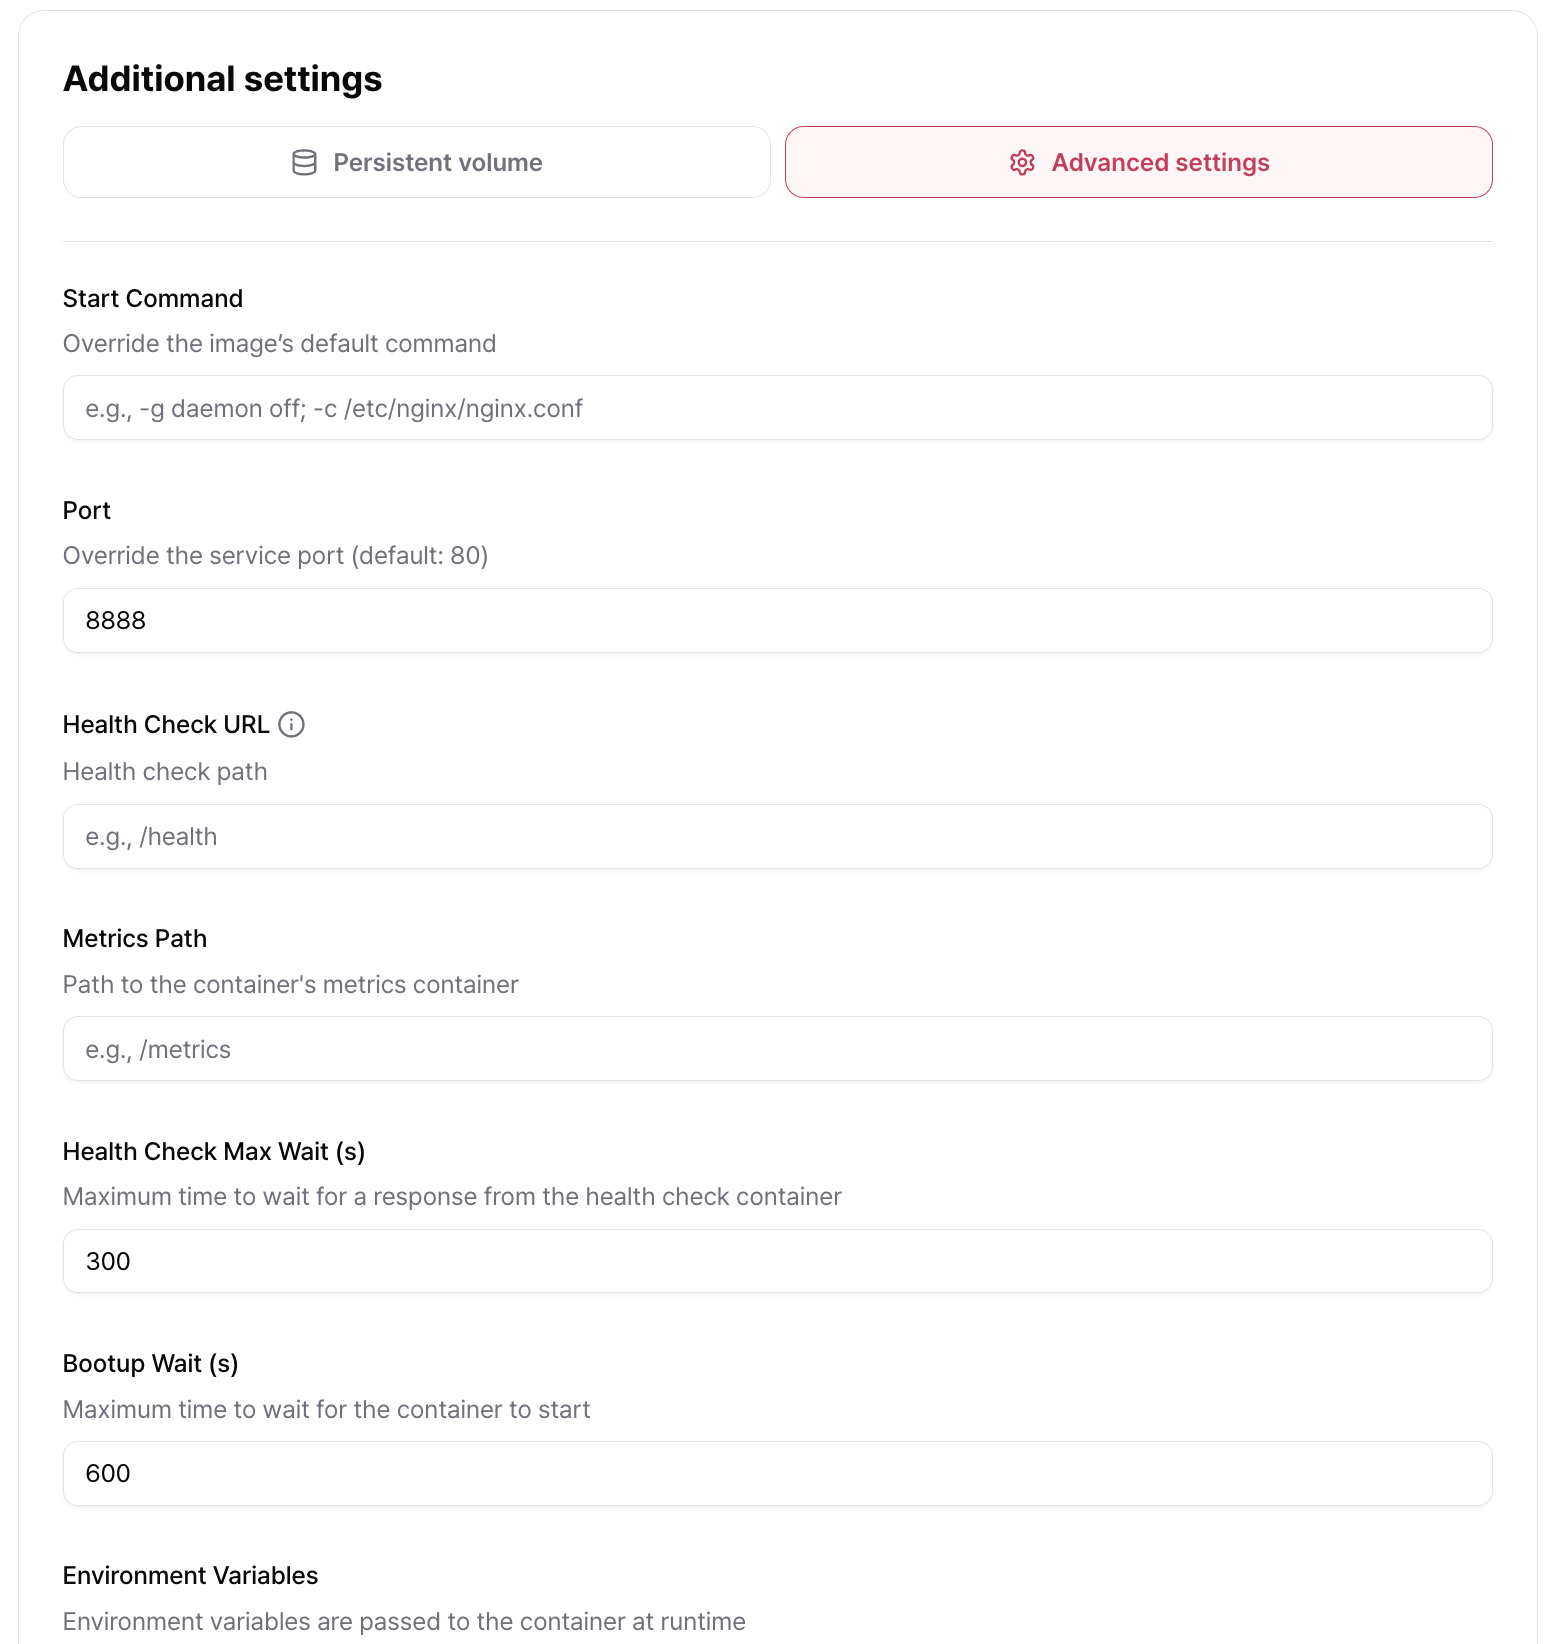
Advanced Settings provide fine-grained control over container behavior. All fields are optional.
| Item | Description |
| ----------------- | --------------------------------------------------------------------------------------------------------------------------------------- |
| **Volume Source** | **Create New Volume** creates a dedicated volume for this container. **Attach Existing Volume** shares a volume with another container. |
| **Mount Path** | The directory inside the container where the volume is mounted. Default: `/workspace`. |
| **Capacity (GB)** | Maximum storage capacity. Default: **30 GB**. |
#### Advanced Settings
Advanced Settings provide fine-grained control over container behavior. All fields are optional.
 | Item | Description |
| ---------------------------------- | --------------------------------------------------------------------------------------------------- |
| **Startup Command** | Overrides the default command defined in the container image. Leave blank to use the image default. |
| **Port** | Port exposed by the application. Default: **80**. |
| **Health Check URL** | Endpoint used to verify service health (for example, `/health`). |
| **Metrics Path** | Endpoint used to expose application metrics (for example, `/metrics`). |
| **Health Check Timeout (Seconds)** | Maximum time to wait for a health check response. Default: **300 seconds**. |
| **Startup Timeout (Seconds)** | Maximum time allowed for the container to start successfully. Default: **600 seconds**. |
| **Environment Variables** | Key-value pairs injected into the container at runtime. Click **+ Add** to add more variables. |
| **Container ID** | Automatically generated unique identifier for the container. |
### 4. Create the Container
Review your configuration and estimated cost (**1 Hour**, **1 Day**, and **30 Days**) in the **Deployment Summary** panel, then click **Create Container**.
Enable **Deploy Immediately** to start deployment as soon as the container is created.
If disabled, the container is created in the **Pending** state and can be started manually later.
Containers in the **Pending** state do not incur charges. Charges begin only after the container is started.
***
## Create from Scratch
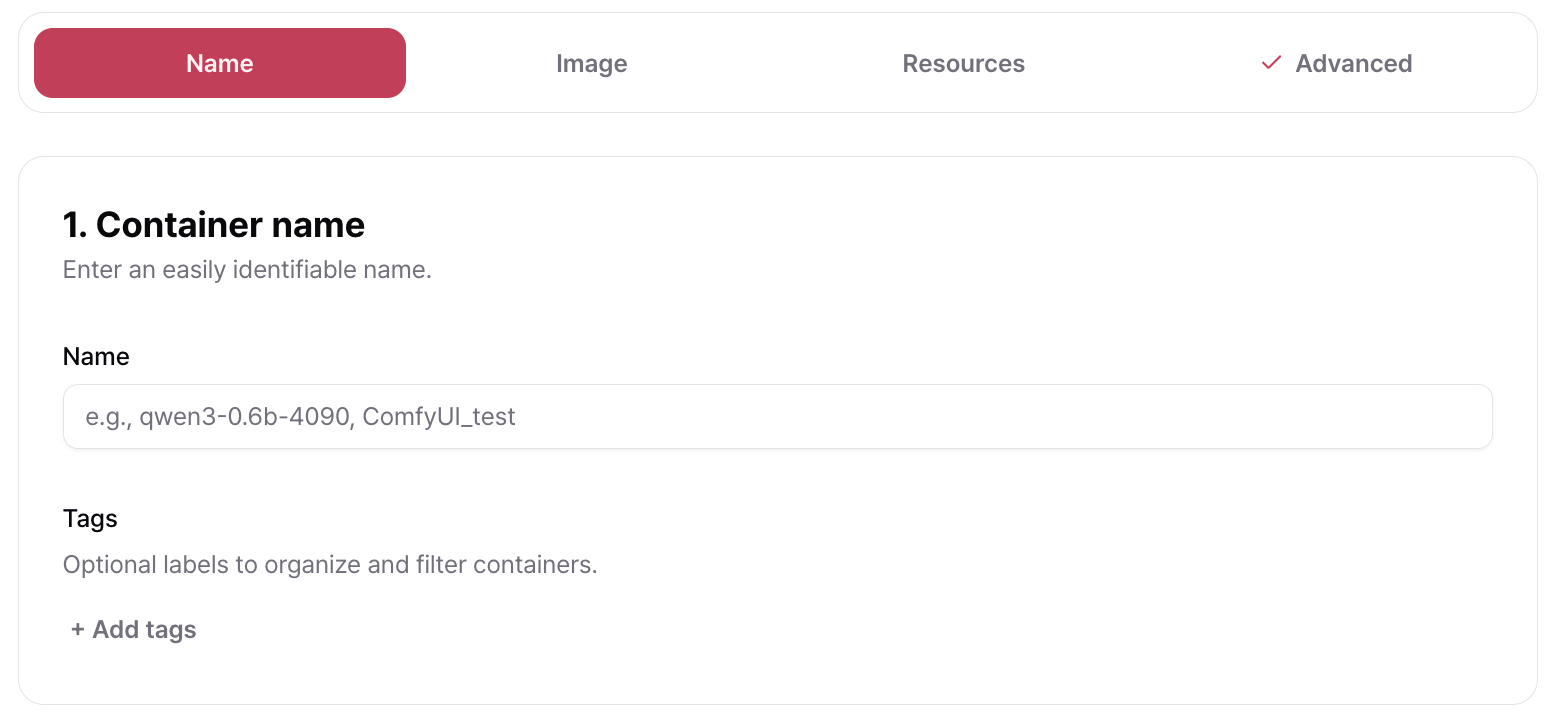
### 1. Configure the Container Name
Enter a container name and optionally assign tags.
| Item | Description |
| ---------------------------------- | --------------------------------------------------------------------------------------------------- |
| **Startup Command** | Overrides the default command defined in the container image. Leave blank to use the image default. |
| **Port** | Port exposed by the application. Default: **80**. |
| **Health Check URL** | Endpoint used to verify service health (for example, `/health`). |
| **Metrics Path** | Endpoint used to expose application metrics (for example, `/metrics`). |
| **Health Check Timeout (Seconds)** | Maximum time to wait for a health check response. Default: **300 seconds**. |
| **Startup Timeout (Seconds)** | Maximum time allowed for the container to start successfully. Default: **600 seconds**. |
| **Environment Variables** | Key-value pairs injected into the container at runtime. Click **+ Add** to add more variables. |
| **Container ID** | Automatically generated unique identifier for the container. |
### 4. Create the Container
Review your configuration and estimated cost (**1 Hour**, **1 Day**, and **30 Days**) in the **Deployment Summary** panel, then click **Create Container**.
Enable **Deploy Immediately** to start deployment as soon as the container is created.
If disabled, the container is created in the **Pending** state and can be started manually later.
Containers in the **Pending** state do not incur charges. Charges begin only after the container is started.
***
## Create from Scratch
### 1. Configure the Container Name
Enter a container name and optionally assign tags.
 | Item | Description |
| -------- | ------------------------------------------------------- |
| **Name** | A descriptive name for the container. |
| **Tags** | Optional labels used to organize and filter containers. |
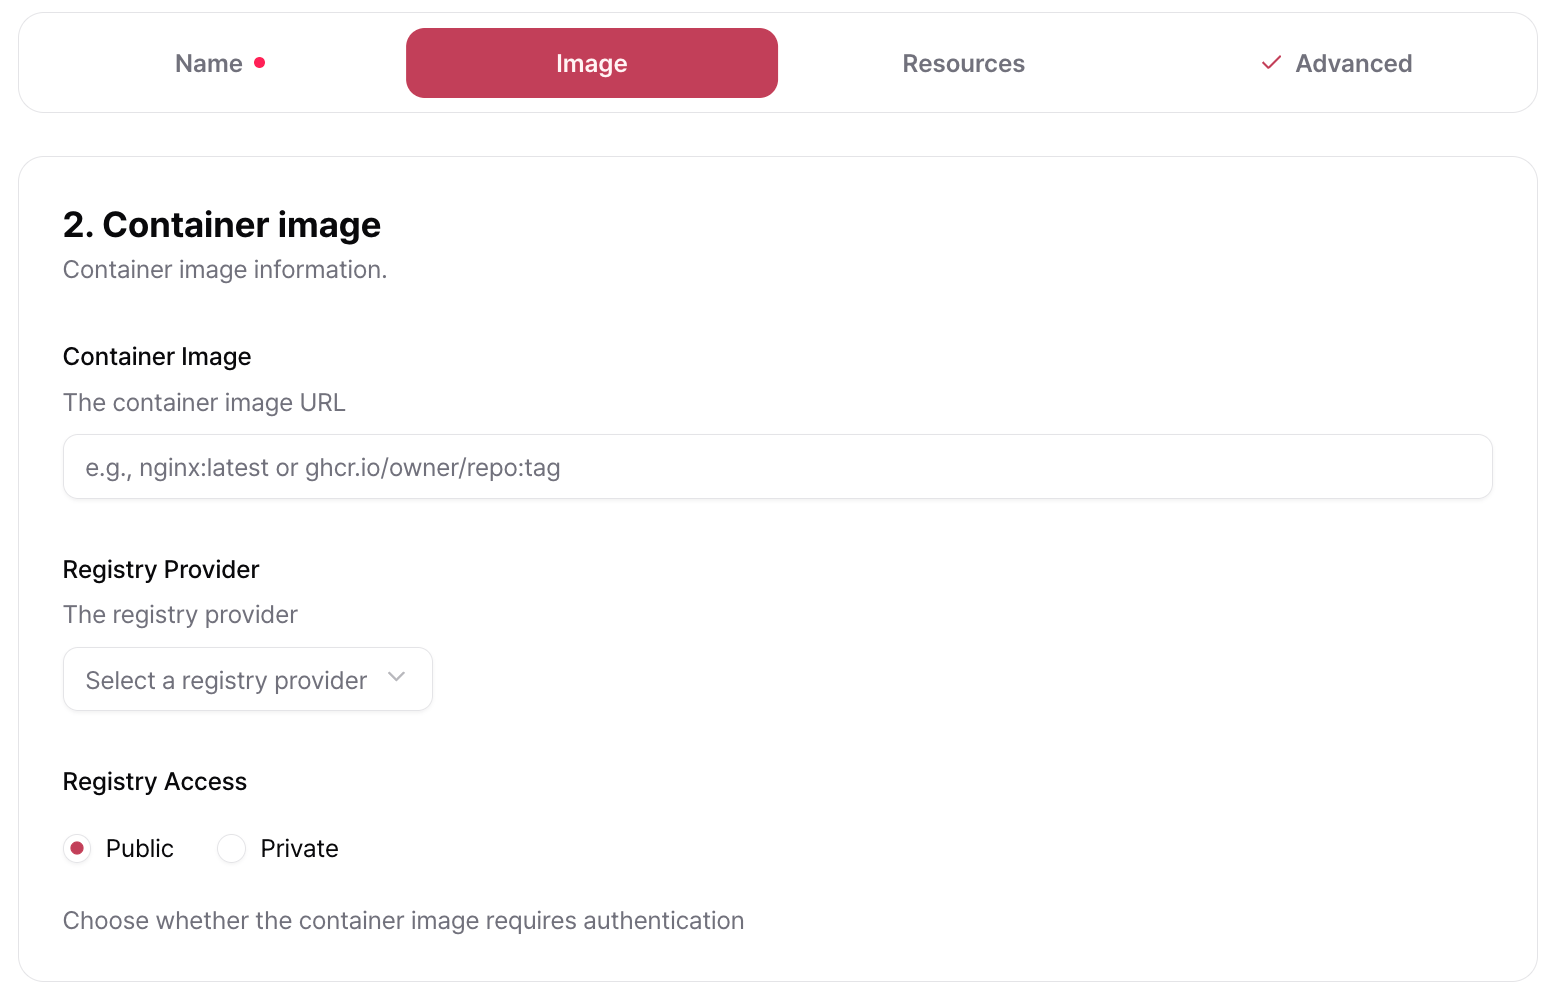
### 2. Configure the Container Image
Enter the container image URL.
AirCloud automatically detects the registry provider from the image URL, but you can change it manually if needed.
| Item | Description |
| -------- | ------------------------------------------------------- |
| **Name** | A descriptive name for the container. |
| **Tags** | Optional labels used to organize and filter containers. |
### 2. Configure the Container Image
Enter the container image URL.
AirCloud automatically detects the registry provider from the image URL, but you can change it manually if needed.
 | Item | Description |
| --------------------- | ---------------------------------------------------------------------------------------------------------------------------- |
| **Container Image** | URL of the container image. |
| **Registry Provider** | Automatically detected from the image URL. Can be changed manually. |
| **Registry Region** | Region where the image is stored. For Amazon ECR, this is detected automatically. |
| **Registry Access** | **Public** images require no authentication.
| Item | Description |
| --------------------- | ---------------------------------------------------------------------------------------------------------------------------- |
| **Container Image** | URL of the container image. |
| **Registry Provider** | Automatically detected from the image URL. Can be changed manually. |
| **Registry Region** | Region where the image is stored. For Amazon ECR, this is detected automatically. |
| **Registry Access** | **Public** images require no authentication.
**Private** registries require a username and password (or access token). |
Supported registry providers:
* Google Artifact Registry
* Amazon Elastic Container Registry (ECR)
* GitHub Container Registry
* Docker Hub
### 3. Configure Resources
Infrastructure options, GPU selection, Replicas, and Persistent Storage are configured in the same way as described in **Deploy from a Template**.
### 4. Configure Advanced Settings (Optional)
Startup commands, ports, health checks, and environment variables are configured in the same way as described in **Advanced Settings**.
### 5. Create the Container
Review the configuration and estimated cost, then click **Create Container**.
***
## Next Steps
Learn how to configure Autoscaling and Scheduled Scaling.
Learn how to monitor container metrics and logs after deployment.